Cook it once
  • Home
  • Privacy Policy
  • Recipes
    • KETO
    • LC
    • WW
  • Tips
  • Contact
Cook it once
  • Home
  • Privacy Policy
  • Recipes
    • KETO
    • LC
    • WW
  • Tips
  • Contact
Monthly Archives

June 2020

Main Dish Recipes

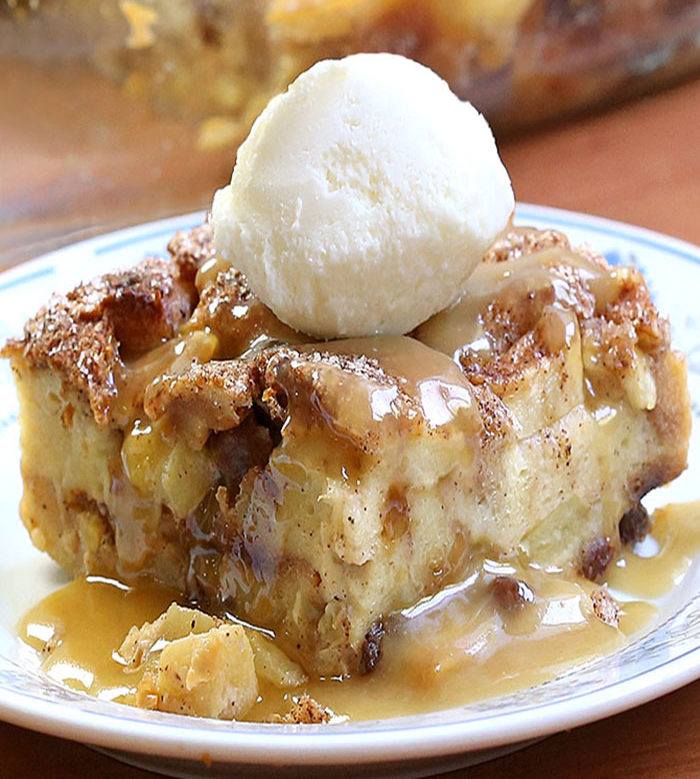
Apple Pie Bread Pudding

by Rebecca June 18, 2020
written by Rebecca

The perfect combination of apple pie and bread pudding. This recipe is a must! Great for breakfast or dessert, either way, you’ll have a blast with this delish Apple Pie Bread Pudding. Don’t forget to top it with a scoop of vanilla ice cream. I promise it’s gonna change everything! Up your game and put this on your dessert menu, I’m pretty sure your whole family will this mouth-watering and heavenly pudding. And so you know this gets way better if sited overnight. Prepare this a night before and pop it in the oven the morning after.

INGREDIENTS

8 cups bread, cubed

3 medium apples, peeled, cored and chopped

4 eggs

1 cup vanilla yogurt

1 cup milk

2 teaspoons cinnamon, divided

½ teaspoon nutmeg

½ cup sugar + 2 tbsp.

½ cup raisins

For the Sauce

1 cup unsalted butter

1 cup heavy cream

1 cup brown sugar

How to make Apple Pie Bread Pudding

Step 1: Prepare the oven. Preheat it to 350 degrees. Grease a 9 x 13-inch baking dish with cooking spray.

Step 2: Whisk the yogurt, milk, eggs, 1 teaspoon of cinnamon, nutmeg, and a half cup of sugar in a large bowl.

Step 3: Mix in the sliced apples and raisins. Smoothly fold in the bread cubes and pour the mixture in the prepared baking dish.

Step 4: Mix 2 tablespoons of sugar and 1 teaspoon of cinnamon in a small bowl.

Step 5: Drizzle the sugar and cinnamon mixture on top of the bread pudding.

Step 6: Place inside the preheated oven and bake for 30 to 40 minutes or until puffed and golden brown.

Step 7: Meanwhile, to make the caramel sauce. Stir the butter, heavy cream, and brown sugar in a heavy saucepan over medium-low heat. Bring to a boil. Once boiling, reduce the heat to low and continue to simmer for 5 minutes or until the sauce is thick.

Step 8: Once the pudding is done, remove from the oven and pour the sauce over.

Step 9: Slice and top with vanilla ice cream. Serve and enjoy!

Apple Pie Bread Pudding

Rebecca The perfect combination of apple pie and bread pudding. This recipe is a must! Great for breakfast or dessert, either way, you’ll have a blast with this delish Apple Pie… Main Dish Recipes Apple Pie Bread Pudding European Print This
Nutrition facts: 200 calories 20 grams fat
Rating: 4.5/5
( 2 voted )

Ingredients

  • 8 cups bread, cubed
  • 3 medium apples, peeled, cored and chopped
  • 4 eggs
  • 1 cup vanilla yogurt
  • 1 cup milk
  • 2 teaspoons cinnamon, divided
  • ½ teaspoon nutmeg
  • ½ cup sugar + 2 tbsp.
  • ½ cup raisins
  • For the Sauce
  • 1 cup unsalted butter
  • 1 cup heavy cream
  • 1 cup brown sugar

Instructions

Step 1: Prepare the oven. Preheat it to 350 degrees. Grease a 9 x 13-inch baking dish with cooking spray.

Step 2: Whisk the yogurt, milk, eggs, 1 teaspoon of cinnamon, nutmeg, and a half cup of sugar in a large bowl.

Step 3: Mix in the sliced apples and raisins. Smoothly fold in the bread cubes and pour the mixture in the prepared baking dish.

Step 4: Mix 2 tablespoons of sugar and 1 teaspoon of cinnamon in a small bowl.

Step 5: Drizzle the sugar and cinnamon mixture on top of the bread pudding.

Step 6: Place inside the preheated oven and bake for 30 to 40 minutes or until puffed and golden brown.

Step 7: Meanwhile, to make the caramel sauce. Stir the butter, heavy cream, and brown sugar in a heavy saucepan over medium-low heat. Bring to a boil. Once boiling, reduce the heat to low and continue to simmer for 5 minutes or until the sauce is thick.

Step 8: Once the pudding is done, remove from the oven and pour the sauce over.

Step 9: Slice and top with vanilla ice cream. Serve and enjoy!
June 18, 2020 0 comment
0 FacebookTwitterPinterestEmail
Main Dish Recipes

No-Bake Woolworth Icebox Cheesecake

by Rebecca June 18, 2020
written by Rebecca

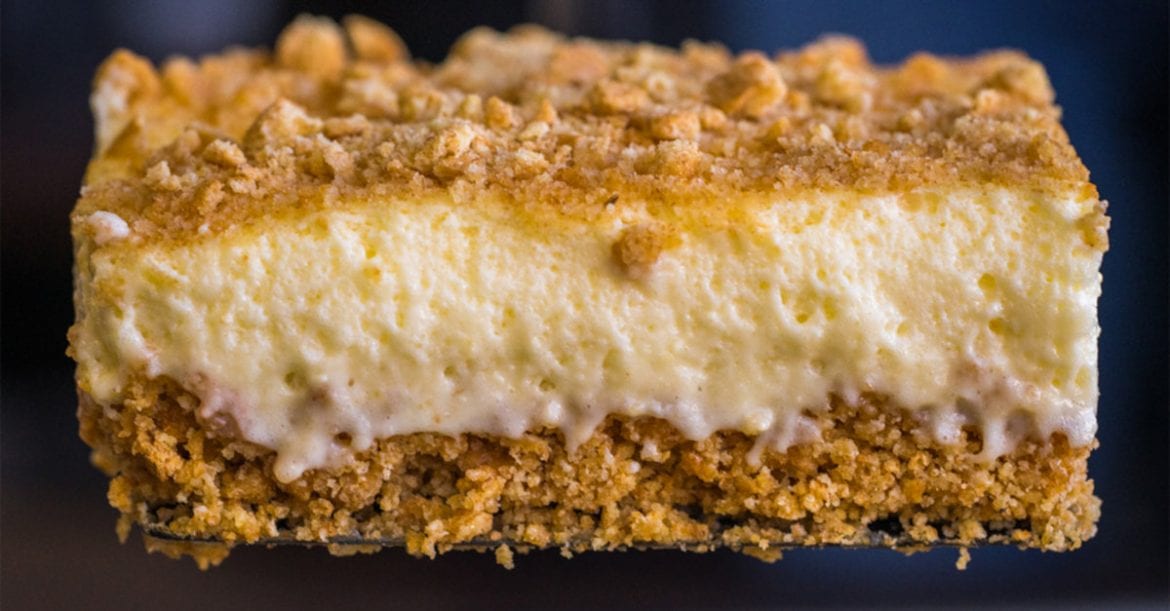
No-bake desserts are extremely impressive. They are like the 2.0 version of the baked goods we enjoy and love. It is like magic! When I moved out of my parent’s house I only have the basics and it took me months to even afford a decent oven. It’s darn hard and I needed to adjust. That’s when I fell in love with no-bake recipes. Don’t underestimate no-bake goodies because they are as great and sometimes even better. Like this No-Bake Woolworth Icebox Cheesecake. It’s one of the many no-bake recipes I kept and fell crazy in love with. A no-fuss, cold, lemony, and light Icebox Cheesecake. This is best served when chilled and reminds me of summer.

INGREDIENTS

1 (3 oz.) package lemon jello

1 cup boiling water

3 cups graham cracker crumbs

1/2 cup (1 stick) butter, melted

1 (8 oz.) package cream cheese

1 cup granulated sugar

4 tablespoons lemon juice

1 (12 oz.) can evaporate milk, chilled

How to make No-Bake Woolworth Icebox Cheesecake

Step 1: Place the jello in a medium bowl and dissolve in boiling water. Let it cool for about 5 to 10 minutes or until the jello is a little thick.

Step 2: Meanwhile, in a medium bowl, mix 3/4 of the graham crumbs with melted butter. Pour into the bottom of a 9 x 13-inch pan and press. Set aside. Don’t forget to reserve the remaining crumbs for topping.

Step 3: Beat the evaporated milk in a medium bowl for 2 to 4 minutes until whipped and fluffy.

Step 4: In a large bowl, combine the cream cheese, sugar, and lemon juice. Mix until smooth.

Step 5: Pour in the thickened jello and fold in the whipped evaporated milk.

Step 6: Evenly spread the filling on the crust. Then, top it with the reserved graham cracker crumbs.

Step 7: Place inside the fridge to chill for at least 2 hours or preferably overnight, covered. Once ready, slice, and serve. Enjoy!

No-Bake Woolworth Icebox Cheesecake

Rebecca No-bake desserts are extremely impressive. They are like the 2.0 version of the baked goods we enjoy and love. It is like magic! When I moved out of my parent’s… Main Dish Recipes No-Bake Woolworth Icebox Cheesecake European Print This
Nutrition facts: 200 calories 20 grams fat
Rating: 5.0/5
( 1 voted )

Ingredients

  • 1 (3 oz.) package lemon jello
  • 1 cup boiling water
  • 3 cups graham cracker crumbs
  • 1/2 cup (1 stick) butter, melted
  • 1 (8 oz.) package cream cheese
  • 1 cup granulated sugar
  • 4 tablespoons lemon juice
  • 1 (12 oz.) can evaporate milk, chilled

Instructions

Step 1: Place the jello in a medium bowl and dissolve in boiling water. Let it cool for about 5 to 10 minutes or until the jello is a little thick.

Step 2: Meanwhile, in a medium bowl, mix 3/4 of the graham crumbs with melted butter. Pour into the bottom of a 9 x 13-inch pan and press. Set aside. Don't forget to reserve the remaining crumbs for topping.

Step 3: Beat the evaporated milk in a medium bowl for 2 to 4 minutes until whipped and fluffy.

Step 4: In a large bowl, combine the cream cheese, sugar, and lemon juice. Mix until smooth.

Step 5: Pour in the thickened jello and fold in the whipped evaporated milk.

Step 6: Evenly spread the filling on the crust. Then, top it with the reserved graham cracker crumbs.

Step 7: Place inside the fridge to chill for at least 2 hours or preferably overnight, covered. Once ready, slice, and serve. Enjoy!


June 18, 2020 0 comment
0 FacebookTwitterPinterestEmail
Main Dish Recipes

Roasted Garlic Mushrooms

by Rebecca June 18, 2020
written by Rebecca

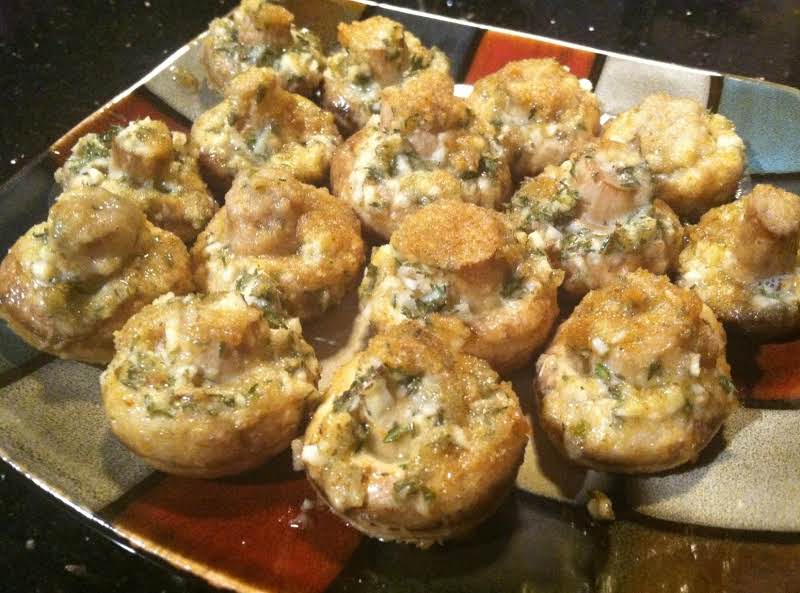
A very simple and easy recipe to make for a “healthy” treat that you will surely enjoy! I make this every time I eat something fatty the night after. It kind of cleans my body. I don’t know but it feels good after eating this Roasted Garlic Mushrooms. My grandma used to force me to eat vegetables but I was so hesitant because I did not want to eat something that is not appealing to me. Now that I am an adult, I have found the best healthy food that has an appeal to me. Hats off to my grandma still for being the best cook that I know but this recipe is all me. She was so proud that I am eating vegetables now. Yeah, I’m still her little grandchild. I cooked this yesterday and she tasted it. You know what happens next, she loved it! I know that you’re gonna love it too!

INGREDIENTS

1 pound fresh mushroom, halved

1 spray olive oil cooking spray

1/8 teaspoon table salt, or to taste

1/8 teaspoon black pepper, or to taste

1 clove, medium garlic clove, minced or pressed

1 tablespoon fresh thyme, minced

1 tablespoon balsamic vinegar

How to make Roasted Garlic Mushrooms

Step 1: Ready the oven and preheat to 450 degrees F.

Step 2: Add the mushrooms in a large jelly roll and arrange them in a single layer. Apply cooking spray and coat the mushrooms. Sprinkle salt and pepper.

Step 3: Roast the other side of the mushrooms for 15 minutes and flip it over to roast the other side for 5 to 10 minutes more.

Step 4: In a large bowl, add thyme and garlic.

Step 5: Transfer the mushrooms into the large bowl with the garlic and thyme. Toss the bowl to coat the mushrooms completely with garlic and thyme.

Step 6: Pour vinegar and toss it again until all ingredients are incorporated.

Step 7: Serve and enjoy! (Make 1 cup per serving.)

Roasted Garlic Mushrooms

Rebecca A very simple and easy recipe to make for a “healthy” treat that you will surely enjoy! I make this every time I eat something fatty the night after. It… Main Dish Recipes Roasted Garlic Mushrooms European Print This
Nutrition facts: 200 calories 20 grams fat
Rating: 5.0/5
( 2 voted )

Ingredients

  • 1 pound fresh mushroom, halved
  • 1 spray olive oil cooking spray
  • 1/8 teaspoon table salt, or to taste
  • 1/8 teaspoon black pepper, or to taste
  • 1 clove, medium garlic clove, minced or pressed
  • 1 tablespoon fresh thyme, minced
  • 1 tablespoon balsamic vinegar

Instructions

Step 1: Ready the oven and preheat to 450 degrees F.

Step 2: Add the mushrooms in a large jelly roll and arrange them in a single layer. Apply cooking spray and coat the mushrooms. Sprinkle salt and pepper.

Step 3: Roast the other side of the mushrooms for 15 minutes and flip it over to roast the other side for 5 to 10 minutes more.

Step 4: In a large bowl, add thyme and garlic.

Step 5: Transfer the mushrooms into the large bowl with the garlic and thyme. Toss the bowl to coat the mushrooms completely with garlic and thyme.

Step 6: Pour vinegar and toss it again until all ingredients are incorporated.

Step 7: Serve and enjoy! (Make 1 cup per serving.)


June 18, 2020 0 comment
0 FacebookTwitterPinterestEmail
Main Dish Recipes

Cherry Pineapple Dump Cake

by Rebecca June 18, 2020
written by Rebecca

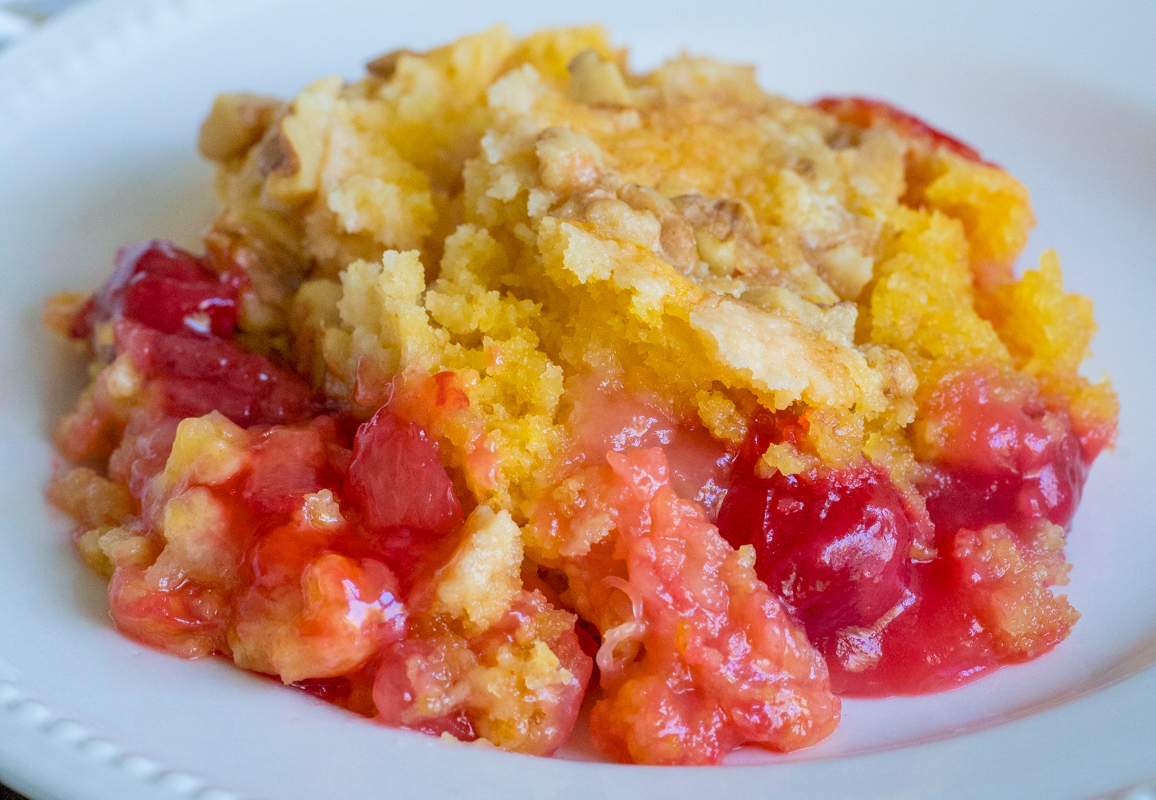
I was so amazed by this Cake! A friend of mine brought a slice of this last week. She was so insistent that I take a bite of it. She said that she has found her soulmate! One bite and I got what she was saying. It was awesome! So, I asked her if she made it. Sadly, she bought it and had no idea how to make it. Fortunately enough though, I watched it on TV. The same Cherry Pineapple Dump Cake that she brought. To my surprise, it was not difficult to make. It only has 5 easy steps and 7 basic ingredients! I immediately called my friend to give her the good news. She came to the house as fast as she could and we started preparing. It was one of the best days of my life. Good company and good food. Nothing beats that! So, call your friend and spend the day laughing and cooking!

INGREDIENTS

1 (21 oz.) can cherry pie filling

1 (20 oz.) can crushed pineapple

1 (15.25 oz.) package yellow cake mix

1/2 cup walnuts, roughly chopped

1/2 cup (1 stick) unsalted butter, sliced thinly into pats

Vanilla ice cream

Whipped cream

How to make Cherry Pineapple Dump Cake

Step 1: Ready the oven and preheat to 350 degrees C.

Step 2: Apply cooking spray or spread a little butter on a 9×13-inch baking dish.

Step 3: Add the cherry pie filling in the baking dish and spread it to form a layer.

Step 4: Add the crushed pineapples on top and spread it gently on top of the cherry layer followed by the cake mix.

Step 5: Add the butter taps on top of the cake mix layer. Spread the butter taps to cover the cake mix then add a layer of walnuts.

Step 6: Put the baking dish inside the preheated oven and bake for 35 to 40 minutes or until the color turns golden brown and fluffy.

Step 7: Remove the pan from the oven and let it sit on a wire rack to cool to room temperature for 15 minutes.

Step 8: Serve and enjoy!

June 18, 2020 0 comment
0 FacebookTwitterPinterestEmail
Main Dish Recipes

DELUXE EGG SALAD

by Rebecca June 18, 2020
written by Rebecca

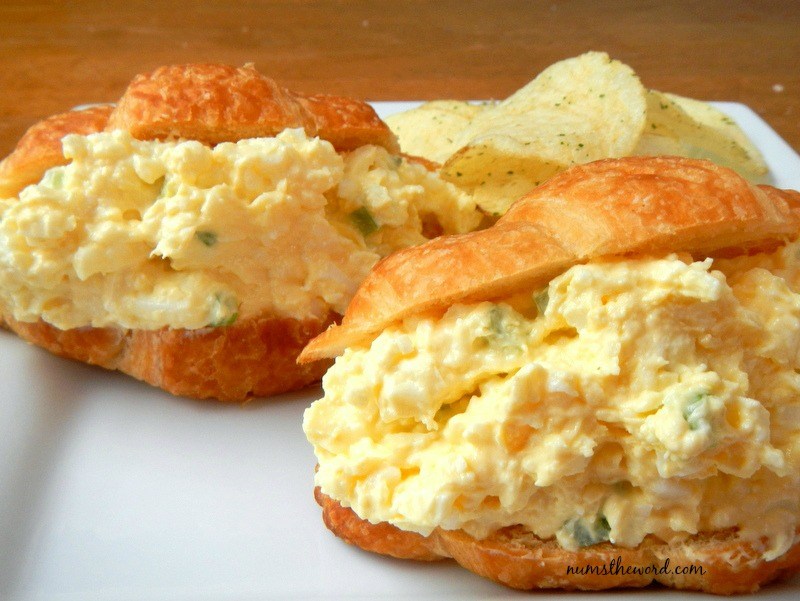
Who’s up for a picnic? Bread and egg salad are on me! This amazing treat is perfect for family outings. Just the other day, my kids and I went to our backyard to have a picnic. We have this amazing backyard with a lot of apple trees so it kind of feels like you are in a park or something. Anyway, I made this Deluxe Eggs Salad and I bought bread and croissants.  It was the best day ever! The best picnic food says my youngest son. In this egg salad, you have the option to add your preferred additional ingredients. For example, try adding crushed bacon. It gives a meaty taste to the salad that makes it perfect for kids that crave bacon all the time. You can also add freshly chopped spring onions for that earthy-fresh flavor. I sometimes add chopped chilis. If you want your salad to have a nice kick, try adding some chilis. It also goes well with the other ingredients. I hope this makes you happy today! Enjoy!

INGREDIENTS

2 tablespoons butter, room temperature

3 oz cream cheese, room temperature

2 tablespoons celery, minced

1 tablespoon Mayo (or more if desired)

1 teaspoon onion, grated

1 teaspoon sugar

1/2 teaspoon lemon juice

1/4 teaspoon salt

1/8 teaspoon pepper

6 hard-boiled eggs, finely chopped or squished with a fork.

Croissants or Bread

Paprika (optional)

Dill Pickle Relish (optional)

Bacon (optional)

HOW TO MAKE DELUXE EGG SALAD

Step 1: Add butter and cream cheese in a medium bowl. Whisk until smooth and creamy.

Step 2: Add mayonnaise, onion, celery, salt, pepper, and lemon juice into the bowl with the cream cheese and butter mixture. Mix until all ingredients are blended.

Step 3: Add the hard-boiled eggs and stir until well-mixed.

Step 4: Cover with plastic cover and let it chill for at least 1 hour.

Step 5: This is best served on croissants or any bread. Enjoy!

DELUXE EGG SALAD

Rebecca Who’s up for a picnic? Bread and egg salad are on me! This amazing treat is perfect for family outings. Just the other day, my kids and I went to… Main Dish Recipes DELUXE EGG SALAD European Print This
Nutrition facts: 200 calories 20 grams fat
Rating: 5.0/5
( 2 voted )

Ingredients

  • 2 tablespoons butter, room temperature
  • 3 oz cream cheese, room temperature
  • 2 tablespoons celery, minced
  • 1 tablespoon Mayo (or more if desired)
  • 1 teaspoon onion, grated
  • 1 teaspoon sugar
  • 1/2 teaspoon lemon juice
  • 1/4 teaspoon salt
  • 1/8 teaspoon pepper
  • 6 hard-boiled eggs, finely chopped or squished with a fork.
  • Croissants or Bread
  • Paprika (optional)
  • Dill Pickle Relish (optional)
  • Bacon (optional)

Instructions

Step 1: Add butter and cream cheese in a medium bowl. Whisk until smooth and creamy.

Step 2: Add mayonnaise, onion, celery, salt, pepper, and lemon juice into the bowl with the cream cheese and butter mixture. Mix until all ingredients are blended.

Step 3: Add the hard-boiled eggs and stir until well-mixed.

Step 4: Cover with plastic cover and let it chill for at least 1 hour.

Step 5: This is best served on croissants or any bread. Enjoy!

June 18, 2020 0 comment
0 FacebookTwitterPinterestEmail
Main Dish Recipes

Million Dollar Spaghetti Casserole

by Rebecca June 18, 2020
written by Rebecca

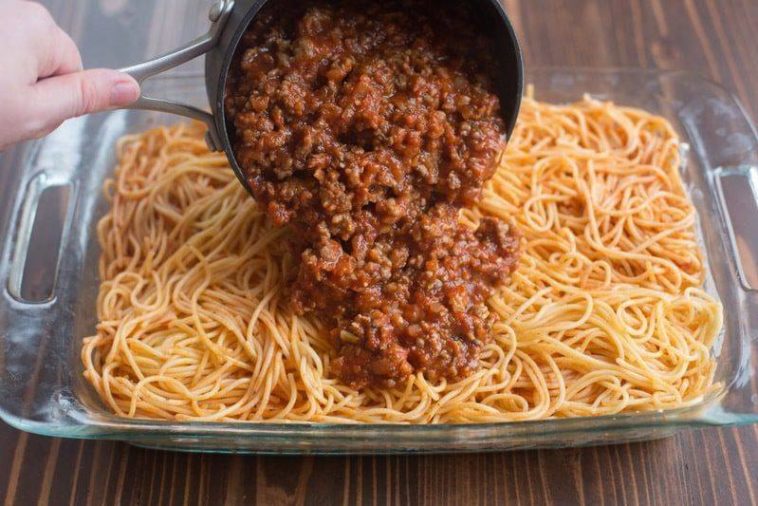
I love good tasting spaghetti! Who doesn’t? I know you all have your recipes of spaghetti but let me share with you my recipe. This might give you a different approach to the dish we all love! Instead of the traditional way of cooking it on the stove, I made it a casserole dish where I baked it. The melted cheese is my favorite part. It is perfectly beautiful to look at. Serve it with garlic bread and iced tea. It’s the best!

INGREDIENTS

1 lb of ground beef

1 jar of spaghetti sauce

8 oz of cream cheese

¼ cup sour cream

½ lb cottage cheese (equals 1 cup)

½ cup butter (1 stick)

1 pkg spaghetti 16 oz

Grated cheddar cheese

How to make Spaghetti Casserole

Step 1: Ready the oven and preheat to 350 degrees C.

Step 2: Refer to the instructions provided on the package of the pasta noodles on how to cook the noodles. Drain and set aside.

Step 3: In a medium mixing bowl, mix sour cream, cottage cheese, and cream cheese. Stir until well-combined.

Step 4: Place a skillet on the stove and turn the heat to medium. Add oil and fry the hamburger. When both sides are brown, turn off the heat. Drain the excess oil and add the cooked hamburgers into the spaghetti sauce.

Step 5: Meanwhile, add 2 or 3 slices of butter into a 9×13 pan. Spread the butter and toss in half of the cooked pasta over the butter.

Step 6: Pour in the cream cheese mixture over the pasta. Spread the sauce nicely on top of the noodles.

Step 7: Add the other half of the pasta over the cheese mixture then add another 2 or 3 slices of butter.

Step 8: Pour and spread the spaghetti sauce with hamburger over the noodles.

Step 9: Place the pan inside the oven and bake for 30 minutes.

Step 10: Remove the pan from the oven.

Step 11: Sprinkle grated cheese on top of the spaghetti and put it back in the oven. Bake for another 15 minutes or until the cheese has completely melted.

Step 12: Remove from the oven. Serve hot and enjoy!

Million Dollar Spaghetti Casserole

Rebecca I love good tasting spaghetti! Who doesn’t? I know you all have your recipes of spaghetti but let me share with you my recipe. This might give you a different… Main Dish Recipes Million Dollar Spaghetti Casserole European Print This
Nutrition facts: 200 calories 20 grams fat
Rating: 5.0/5
( 1 voted )

Ingredients

  • 1 lb of ground beef
  • 1 jar of spaghetti sauce
  • 8 oz of cream cheese
  • ¼ cup sour cream
  • ½ lb cottage cheese (equals 1 cup)
  • ½ cup butter (1 stick)
  • 1 pkg spaghetti 16 oz
  • Grated cheddar cheese

Instructions

Step 1: Ready the oven and preheat to 350 degrees C.

Step 2: Refer to the instructions provided on the package of the pasta noodles on how to cook the noodles. Drain and set aside.

Step 3: In a medium mixing bowl, mix sour cream, cottage cheese, and cream cheese. Stir until well-combined.

Step 4: Place a skillet on the stove and turn the heat to medium. Add oil and fry the hamburger. When both sides are brown, turn off the heat. Drain the excess oil and add the cooked hamburgers into the spaghetti sauce.

Step 5: Meanwhile, add 2 or 3 slices of butter into a 9x13 pan. Spread the butter and toss in half of the cooked pasta over the butter.

Step 6: Pour in the cream cheese mixture over the pasta. Spread the sauce nicely on top of the noodles.

Step 7: Add the other half of the pasta over the cheese mixture then add another 2 or 3 slices of butter.

Step 8: Pour and spread the spaghetti sauce with hamburger over the noodles.

Step 9: Place the pan inside the oven and bake for 30 minutes.

Step 10: Remove the pan from the oven.

Step 11: Sprinkle grated cheese on top of the spaghetti and put it back in the oven. Bake for another 15 minutes or until the cheese has completely melted.

Step 12: Remove from the oven. Serve hot and enjoy!

June 18, 2020 0 comment
0 FacebookTwitterPinterestEmail
Main Dish Recipes

Do Nothing Tornado Cake

by Rebecca June 18, 2020
written by Rebecca

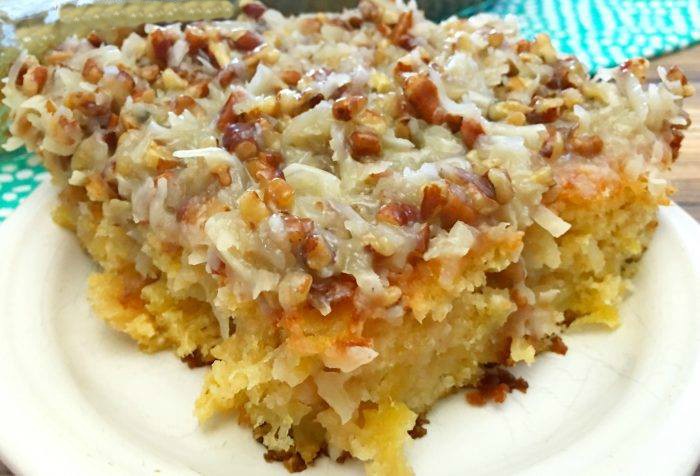
Have you ever been so satisfied with your life? This recipe I am sharing with you today is the most satisfying I have eaten in the past 3 months. It has become my favorite of all the cakes out there! I don’t mean to be biassed but this might be the best cake there is! You don’t believe me? Give it a try and you’ll be surprised by the complexity of flavors that are present in it. Aside from the basic ingredients, there are only 10 easy steps that you need to follow to achieve perfection! I hope you love it!

INGREDIENTS

For the Cake

2 cups all-purpose flour

1 teaspoons baking soda

2 cups granulated sugar

2 large eggs

1 teaspoon vanilla extract

20oz can crushed pineapple

For the Topping

1/2 cup salted butter

1/2 teaspoon vanilla extract

2/3 cup evaporated milk

1 cup granulated sugar

1 cup chopped pecans

1 cup sweetened coconut flakes

How to make Tornado Cake

Step 1: Ready the oven and preheat to 350 degrees.

Step 2: Spread butter in a 9×13-inch baking pan.

Step 3: Combine sugar, baking soda, flour, crushed pineapple, vanilla, and eggs in a large mixing bowl. Stir until well-mixed.

Step 4: Transfer the mixture into the greased baking pan.

Step 5: Place the baking pan inside the preheated oven and bake for 40 to 45 minutes or until the color turns color brown.

Step 6: Remove the pan from the oven.

Step 7: Pinch multiple holes on the cake using any handle of a wooden spoon or spatula.

Step 8: Place a medium saucepan on the stove and turn the heat to medium. Add in the butter, vanilla, sugar, and evaporated milk then bring to a boil.

Step 9: Add in the coconut and pecans then reduce the heat to medium-low heat. Cook for another 5 minutes while stirring continuously.

Step 10: Spread the mixture on top of the cake. Slice to your preference. Serve and enjoy!

Do Nothing Tornado Cake

Rebecca Have you ever been so satisfied with your life? This recipe I am sharing with you today is the most satisfying I have eaten in the past 3 months. It… Main Dish Recipes Do Nothing Tornado Cake European Print This
Nutrition facts: 200 calories 20 grams fat
Rating: 4.5/5
( 2 voted )

Ingredients

  • For the Cake
  • 2 cups all-purpose flour
  • 1 teaspoons baking soda
  • 2 cups granulated sugar
  • 2 large eggs
  • 1 teaspoon vanilla extract
  • 20oz can crushed pineapple
  • For the Topping
  • 1/2 cup salted butter
  • 1/2 teaspoon vanilla extract
  • 2/3 cup evaporated milk
  • 1 cup granulated sugar
  • 1 cup chopped pecans
  • 1 cup sweetened coconut flakes

Instructions

Step 1: Ready the oven and preheat to 350 degrees.

Step 2: Spread butter in a 9x13-inch baking pan.

Step 3: Combine sugar, baking soda, flour, crushed pineapple, vanilla, and eggs in a large mixing bowl. Stir until well-mixed.

Step 4: Transfer the mixture into the greased baking pan.

Step 5: Place the baking pan inside the preheated oven and bake for 40 to 45 minutes or until the color turns color brown.

Step 6: Remove the pan from the oven.

Step 7: Pinch multiple holes on the cake using any handle of a wooden spoon or spatula.

Step 8: Place a medium saucepan on the stove and turn the heat to medium. Add in the butter, vanilla, sugar, and evaporated milk then bring to a boil.

Step 9: Add in the coconut and pecans then reduce the heat to medium-low heat. Cook for another 5 minutes while stirring continuously.

Step 10: Spread the mixture on top of the cake. Slice to your preference. Serve and enjoy!

June 18, 2020 0 comment
0 FacebookTwitterPinterestEmail
Main Dish Recipes

Upside-Down Georgia Pecan Cake

by Rebecca June 18, 2020
written by Rebecca

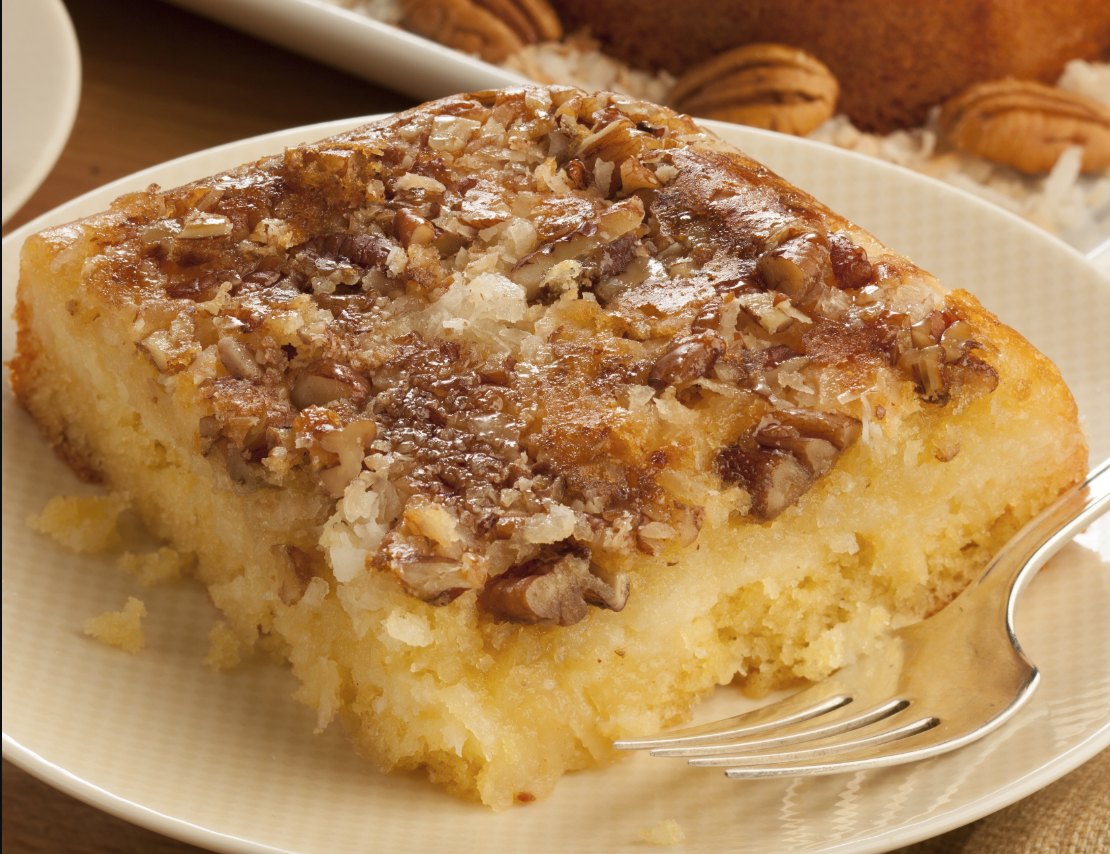
A sweet treat that comes straight out of Georgia. This Upside-Down Georgia Pecan Cake is a deliciously rich and soft cake with a nutty flavor. It is a delightful nutty dessert that will melt your heart.

INGREDIENTS

For the topping

2 cups toasted pecans, chopped

1 cup shredded coconut

2/3 cup brown sugar

6 tablespoons butter, melted

2 teaspoons ground cinnamon

2 teaspoons vanilla extract

1/2 teaspoon salt

For the cake

2 cups all-purpose flour

1 cup brown sugar, packed

1 cup milk

2/3 cup butter, softened

2 large eggs

1 tablespoon baking powder

2 teaspoons vanilla

1/4 teaspoon salt

How to make Upside-Down Georgia Pecan Cake

Step 1: Prepare the oven. Preheat it to 350 degrees F. Use an aluminum foil to line a 9 x 13-inch pan and make sure the foil is hanging a bit over the sides. Then, spray with a non-stick spray to grease the pan.

Step 2: Place the pecans, brown sugar, and a cup of coconut into the pan.

Step 3: Sprinkle over some cinnamon and salt, then, drizzle the top with vanilla extract and melted butter.

Step 4: Place 2/3 cup of butter and a cup of brown sugar in a medium bowl. Beat with an electric mixer on medium speed until creamy.

Step 5: Reduce the speed to low and continue mixing. Add in the eggs one at a time, then, the vanilla. Mix until incorporated.

Step 6: Mix in the baking powder and salt until combined. Place half cup of the flour, then, milk, and the remaining flour. Make sure to beat after each addition.

Step 7: Pour the batter into the prepared pan on top of the pecan mixture.

Step 8: Place inside the preheated oven and bake for 35 to 40 minutes. Once the toothpick inserted in the center comes out clean it is done.

Step 9: Remove from the oven. To loosen the cake, run a knife around the sides of the pan but don’t remove from cake yet. Let it cool for 5 minutes in the pan.

Step 10: After the cake is slightly cooled, invert the cake onto a cake platter and let it cool for 15 minutes more before serving.

Upside-Down Georgia Pecan Cake

Rebecca A sweet treat that comes straight out of Georgia. This Upside-Down Georgia Pecan Cake is a deliciously rich and soft cake with a nutty flavor. It is a delightful nutty… Main Dish Recipes Upside-Down Georgia Pecan Cake European Print This
Nutrition facts: 200 calories 20 grams fat
Rating: 5.0/5
( 1 voted )

Ingredients

  • For the topping
  • 2 cups toasted pecans, chopped
  • 1 cup shredded coconut
  • 2/3 cup brown sugar
  • 6 tablespoons butter, melted
  • 2 teaspoons ground cinnamon
  • 2 teaspoons vanilla extract
  • 1/2 teaspoon salt
  • For the cake
  • 2 cups all-purpose flour
  • 1 cup brown sugar, packed
  • 1 cup milk
  • 2/3 cup butter, softened
  • 2 large eggs
  • 1 tablespoon baking powder
  • 2 teaspoons vanilla
  • 1/4 teaspoon salt

Instructions

Step 1: Prepare the oven. Preheat it to 350 degrees F. Use an aluminum foil to line a 9 x 13-inch pan and make sure the foil is hanging a bit over the sides. Then, spray with a non-stick spray to grease the pan.

Step 2: Place the pecans, brown sugar, and a cup of coconut into the pan.

Step 3: Sprinkle over some cinnamon and salt, then, drizzle the top with vanilla extract and melted butter.

Step 4: Place 2/3 cup of butter and a cup of brown sugar in a medium bowl. Beat with an electric mixer on medium speed until creamy.

Step 5: Reduce the speed to low and continue mixing. Add in the eggs one at a time, then, the vanilla. Mix until incorporated.

Step 6: Mix in the baking powder and salt until combined. Place half cup of the flour, then, milk, and the remaining flour. Make sure to beat after each addition.

Step 7: Pour the batter into the prepared pan on top of the pecan mixture.

Step 8: Place inside the preheated oven and bake for 35 to 40 minutes. Once the toothpick inserted in the center comes out clean it is done.

Step 9: Remove from the oven. To loosen the cake, run a knife around the sides of the pan but don't remove from cake yet. Let it cool for 5 minutes in the pan.

Step 10: After the cake is slightly cooled, invert the cake onto a cake platter and let it cool for 15 minutes more before serving.

June 18, 2020 0 comment
0 FacebookTwitterPinterestEmail
Main Dish Recipes

Fried Dill Pickles

by Rebecca June 18, 2020
written by Rebecca

What the heck is a fried dill pickle? This is my exact thought when I first saw this recipe online. As I’ve read through the comments my curiosity just was blown off the roof. All of them said great things about it. So I jumped to my feet and put on my apron. First, let me tell you this, I never thought that this would be the easiest and quickest to make. I mean you just need to drain and dry the pickles, mix the egg and flour batter, then, dip the pickles onto the batter, and fry. Easy peasy, right? When these fried dill pickles were out of the pan, I was speechless! I mean they look amazing and they taste absolutely delicious! They are crispy and crunchy with a tangy dill pickle flavor. Now I can officially say that I’ve been missing out! This is a must-try you guys and very addictive I tell you. I’ve made it many times since.

INGREDIENTS

1-pint dill pickle, sliced and undrained

1 large egg, beaten

1 tablespoon all-purpose flour, plus

1 1⁄2 cups all-purpose flour

1⁄2 teaspoon ground red pepper

1 teaspoon garlic powder

1⁄4 teaspoon salt

1 teaspoon paprika

hot sauce

vegetable oil (for frying)

How to make Fried Dill Pickles

Step 1: Drain the pickles and reserve 2/3 cup of pickle juice.

Step 2: Dry the pickles by pressing them between paper towels.

Step 3: In a bowl, combine the reserved pickle juice, egg, 1 tablespoon flour, and hot sauce. Stir until well mixed. Set aside.

Step 4: Mix the remaining flour, red pepper, garlic powder, salt, and paprika. Combine until incorporated.

Step 5: First dip the pickles in the egg mixture, then in the flour mixture.

Step 6: Heat the oil in 375 degrees F and fry the coated pickles until golden brown.

Step 7: Once done, remove from the oil and transfer to paper towels to drain.

Rebecca What the heck is a fried dill pickle? This is my exact thought when I first saw this recipe online. As I’ve read through the comments my curiosity just was… Main Dish Recipes Fried Dill Pickles European Print This
Nutrition facts: 200 calories 20 grams fat
Rating: 5.0/5
( 1 voted )

Ingredients

  • 1-pint dill pickle, sliced and undrained
  • 1 large egg, beaten
  • 1 tablespoon all-purpose flour, plus
  • 1 1⁄2 cups all-purpose flour
  • 1⁄2 teaspoon ground red pepper
  • 1 teaspoon garlic powder
  • 1⁄4 teaspoon salt
  • 1 teaspoon paprika
  • hot sauce
  • vegetable oil (for frying)

Instructions

Step 1: Drain the pickles and reserve 2/3 cup of pickle juice.

Step 2: Dry the pickles by pressing them between paper towels.

Step 3: In a bowl, combine the reserved pickle juice, egg, 1 tablespoon flour, and hot sauce. Stir until well mixed. Set aside.

Step 4: Mix the remaining flour, red pepper, garlic powder, salt, and paprika. Combine until incorporated.

Step 5: First dip the pickles in the egg mixture, then in the flour mixture.

Step 6: Heat the oil in 375 degrees F and fry the coated pickles until golden brown.

Step 7: Once done, remove from the oil and transfer to paper towels to drain.

June 18, 2020 0 comment
0 FacebookTwitterPinterestEmail
Main Dish Recipes

One Bowl Apple Cake

by Rebecca June 17, 2020
written by Rebecca

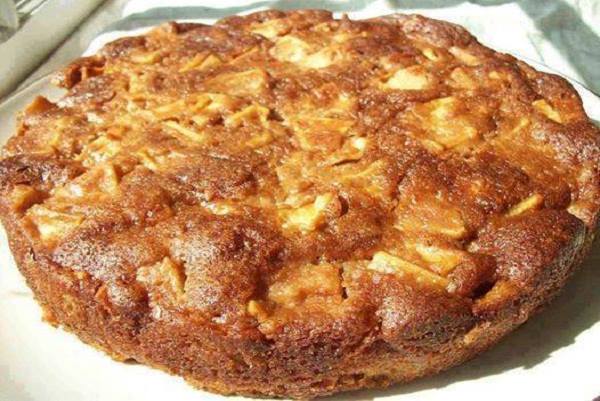
This is a straightforward cake, no heavy baking needed even the no experience baker can make it. Everything happened in one pan. It’s pretty easy to make, just mix everything and pour into a greased pan and bake. The ingredients are easily found, well, except maybe for the apples. But you can use any available apples and it will be as delicious! This might not be the prettiest cake you’ll ever see but this is one of the tastiest cake ever made! It’s super moist, an all-natural cake, nothing artificial, and perfect for everyone. Don’t judge because once you taste it, you’ll keep coming back for more! It’s perfect for any occasion, or if you just want to have it for no reason at all. You can serve this for snack or dessert, it doesn’t matter, you can serve this anytime, any day! I dare you, make this today, follow the instructions below and I bet you’ll be keeping this on your dessert menu. It’s a keeper and an all year round cake.

INGREDIENTS

2 eggs

1 3/4 cups sugar (adjust sugar to your liking)

2 heaping teaspoons cinnamon

1/2 cup oil

6 medium Gala or Fuji or Honey Crisp apples

2 cups flour

2 teaspoons baking soda

How to make One Bowl Apple Cake

Step 1: Prepare the oven. preheat it to 350 degrees.

Step 2: Mix the eggs, sugar, cinnamon, and oil in a large bowl.

Step 3: After peeling the apples, slice them and add to the bowl. Make sure to fully coat the apples with the mixture so they will not turn brown.

Step 4: Then, stir in the baking soda and flour. Mix with a fork until the flour is fully incorporated and absorbed by the wet ingredients.

Step 5: Pour everything into a greased 9 x 13-inch or 2 of 9-inch round pans.

Step 6: Place inside the preheated oven and bake for exactly 55 minutes. Once done, remove from the oven and serve immediately. Enjoy!

One Bowl Apple Cake

Rebecca This is a straightforward cake, no heavy baking needed even the no experience baker can make it. Everything happened in one pan. It’s pretty easy to make, just mix everything… Main Dish Recipes One Bowl Apple Cake European Print This
Nutrition facts: 200 calories 20 grams fat
Rating: 4.0/5
( 2 voted )

Ingredients

  • 2 eggs
  • 1 3/4 cups sugar (adjust sugar to your liking)
  • 2 heaping teaspoons cinnamon
  • 1/2 cup oil
  • 6 medium Gala or Fuji or Honey Crisp apples
  • 2 cups flour
  • 2 teaspoons baking soda

Instructions

Step 1: Prepare the oven. preheat it to 350 degrees.

Step 2: Mix the eggs, sugar, cinnamon, and oil in a large bowl.

Step 3: After peeling the apples, slice them and add to the bowl. Make sure to fully coat the apples with the mixture so they will not turn brown.

Step 4: Then, stir in the baking soda and flour. Mix with a fork until the flour is fully incorporated and absorbed by the wet ingredients.

Step 5: Pour everything into a greased 9 x 13-inch or 2 of 9-inch round pans.

Step 6: Place inside the preheated oven and bake for exactly 55 minutes. Once done, remove from the oven and serve immediately. Enjoy!


June 17, 2020 0 comment
0 FacebookTwitterPinterestEmail
Newer Posts
Older Posts

Popular Posts

  • 1

    Crispy Crunchy Parmesan Potatoes

    March 21, 2020
  • 2

    CROCK POT SMOTHERED PORK CHOPS

    March 21, 2020
  • Facebook
  • Twitter

@2019 - All Right Reserved.


Back To Top