Cook it once
  • Home
  • Privacy Policy
  • Recipes
    • KETO
    • LC
    • WW
  • Tips
  • Contact
Cook it once
  • Home
  • Privacy Policy
  • Recipes
    • KETO
    • LC
    • WW
  • Tips
  • Contact
Monthly Archives

May 2020

Main Dish Recipes

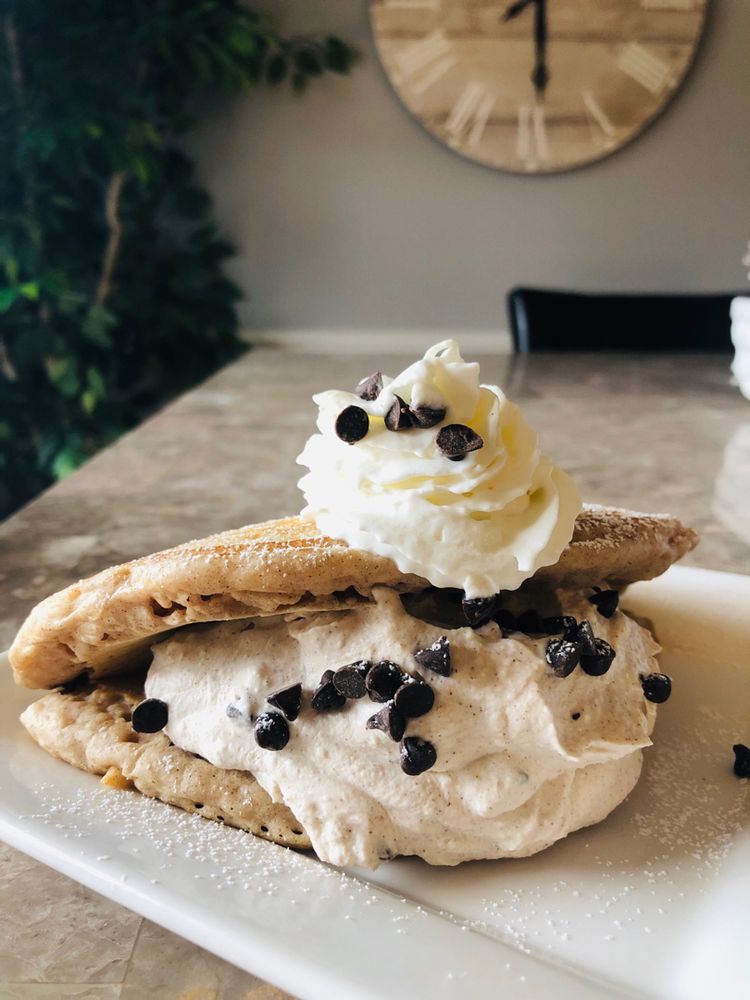
Cannoli Pancakes

by Rebecca May 4, 2020
written by Rebecca

I already tried different kinds of pancakes because my daughter loves them so much! It is her favorite breakfast, sometimes lunch or dinner. I know, she’s crazy about pancakes! That’s why I’m so thrilled and excited when I stumbled upon this gorgeously delicious Cannoli Pancakes. This is my daughter’s new favorite, she likes it with whip cream and some mini chocolate chips (sometimes she asks me to slice some strawberries, too and she’ll stuff them in the cannoli pancakes!). It is pretty easy to make, and I am sure your family will love it too! So the next time you’re making pancakes for breakfast, try this recipe, trust me, your kids will ask for this every day! Anyway, I’m off now, I need to wake up early to prepare and cook this for my kid again tomorrow. I promise her that I’ll be making extra because her friends are coming over for breakfast and she’s super excited!

INGREDIENTS

2 cups heavy cream

1/3 cup powdered sugar, plus more for garnish

1 teaspoon cinnamon

pinch of nutmeg

1 cup ricotta

2 cups mini chocolate chips, divided, plus more for topping

1  box Bisquick, plus ingredients called for on the box

1 tablespoon of butter

1/4 cup of Powdered sugar, for dusting

whipped cream, for garnish

HOW TO MAKE CANNOLI PANCAKES

Step 1: Place the heavy cream, powdered sugar, cinnamon, and nutmeg in a large bowl. Beat using a hand mixer until stiff peaks form. Fold in the ricotta and one cup of chocolate chips then set aside.

Step 2: Make the pancakes following the directions written on the package and add the remaining chocolate chips.

Step 3: Heat the butter in a skillet over medium heat. Make large pancakes, stuff them with about 1/2 cup of the ricotta mixture. And fold in half (it should look like a taco).

Step 4: Garnish your pancakes with powdered sugar, whipped cream, and mini chocolate chips (more of this if you prefer). Serve and enjoy!
Cannoli Pancakes

Rebecca I already tried different kinds of pancakes because my daughter loves them so much! It is her favorite breakfast, sometimes lunch or dinner. I know, she’s crazy about pancakes! That’s… Main Dish Recipes Cannoli Pancakes European Print This
Nutrition facts: 200 calories 20 grams fat
Rating: 5.0/5
( 1 voted )

Ingredients

  • 2 cups heavy cream
  • 1/3 cup powdered sugar, plus more for garnish
  • 1 teaspoon cinnamon
  • pinch of nutmeg
  • 1 cup ricotta
  • 2 cups mini chocolate chips, divided, plus more for topping
  • 1  box Bisquick, plus ingredients called for on the box
  • 1 tablespoon of butter
  • 1/4 cup of Powdered sugar, for dusting
  • whipped cream, for garnish

Instructions

Step 1: Place the heavy cream, powdered sugar, cinnamon, and nutmeg in a large bowl. Beat using a hand mixer until stiff peaks form. Fold in the ricotta and one cup of chocolate chips then set aside.

Step 2: Make the pancakes following the directions written on the package and add the remaining chocolate chips.

Step 3: Heat the butter in a skillet over medium heat. Make large pancakes, stuff them with about 1/2 cup of the ricotta mixture. And fold in half (it should look like a taco).

Step 4: Garnish your pancakes with powdered sugar, whipped cream, and mini chocolate chips (more of this if you prefer). Serve and enjoy!
 

May 4, 2020 0 comment
0 FacebookTwitterPinterestEmail
Main Dish Recipes

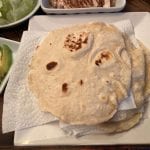
Perfect Homemade Flour Tortillas (Only 5 Ingredients)

by Rebecca May 4, 2020
written by Rebecca

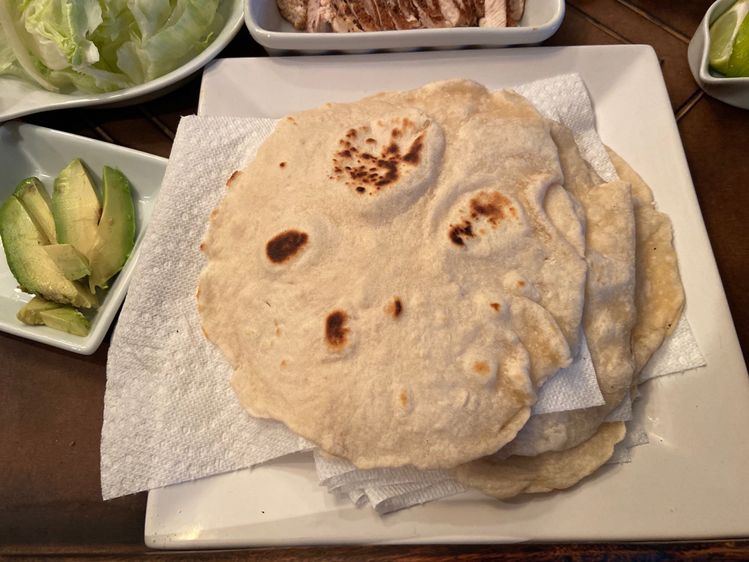
There is nothing better than a nice homemade tortilla. Who says you need to buy everything in department stores? Now, this recipe will not only make you feel good about yourself because you made something from scratch but it is also a way of being productive in times like this. Oh yeah, you read the title right. It only involves 5 basic ingredients. I didn’t know that it only takes 5 ingredients to make the perfect tortilla. Thanks to my dear friend for teaching me how to make it. Now, it is my time to share this with you. I usually use a tortilla for a pizza base. It has a nice texture and crunch to it.

Give this one a try and invite your friends over after this pandemic. Maybe open some beers, talk about happy times. Ahh, it’s gonna be awesome!

Have fun with this recipe and stay safe!

Ingredients

3 cups all-purpose flour

1 tsp. kosher salt

1 tsp. baking powder

1/3 cup canola oil or Crisco or butter (Crisco works best)

1 cup of warm water

Instructions

Combine flour, baking powder, and salt in the bowl of the stand mixer. While the stand mixer is up and running, add in the water and oil. Mix it for 2-3 minutes until you achieve a smooth dough.

Place the dough into a cutting board. (Pour flour to the board to avoid the dough from sticking.) Divide into 16 equal pieces.

Roll each piece and slightly flatten.

Place a large skillet into the stove and turn to over medium-heat while the dough is resting for 15 minutes.  Roll one ball of dough at a time. (Use a rolling pin to make it into thin circles.)

Cook the tortillas for about 1-2 minutes then flip and cook the other side 30 seconds.

Move the cooked tortillas to a clean plate. Repeat the process with the remainder of the dough. Enjoy!

Perfect Homemade Flour Tortillas (Only 5 Ingredients)

Rebecca There is nothing better than a nice homemade tortilla. Who says you need to buy everything in department stores? Now, this recipe will not only make you feel good about… Main Dish Recipes Perfect Homemade Flour Tortillas (Only 5 Ingredients) European Print This
Nutrition facts: 200 calories 20 grams fat
Rating: 5.0/5
( 1 voted )

Ingredients

  • 3 cups all-purpose flour
  • 1 tsp. kosher salt
  • 1 tsp. baking powder
  • 1/3 cup canola oil or Crisco or butter (Crisco works best)
  • 1 cup of warm water

Instructions

Combine flour, baking powder, and salt in the bowl of the stand mixer. While the stand mixer is up and running, add in the water and oil. Mix it for 2-3 minutes until you achieve a smooth dough.

Place the dough into a cutting board. (Pour flour to the board to avoid the dough from sticking.) Divide into 16 equal pieces.

Roll each piece and slightly flatten.

Place a large skillet into the stove and turn to over medium-heat while the dough is resting for 15 minutes.  Roll one ball of dough at a time. (Use a rolling pin to make it into thin circles.)

Cook the tortillas for about 1-2 minutes then flip and cook the other side 30 seconds.

Move the cooked tortillas to a clean plate. Repeat the process with the remainder of the dough. Enjoy!

May 4, 2020 0 comment
0 FacebookTwitterPinterestEmail
Main Dish Recipes

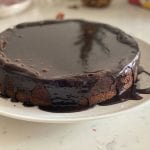
Death By Chocolate Cheesecake

by Rebecca May 4, 2020
written by Rebecca

This recipe is a hit! I get to make this twice in a week because my kids love and crave for it always! It’s so satisfyingly delicious, you would want more!

INGREDIENTS

COOKIE CRUST

24 whole Oreo cookies

6 tablespoons of melted butter

Pinch of kosher salt

CHOCOLATE CHEESECAKE

4 (8-oz.) packages of cream cheese, softened to room temperature

3/4 cup granulated sugar

1/2 cup packed light brown sugar

1/4 cup cocoa powder

1/4 teaspoon kosher salt

4 large eggs

9 oz. bittersweet chocolate, chopped and melted

CHOCOLATE GANACHE

1 1/2 cup of chocolate chips

3/4 cup heavy cream

Chocolate shavings, for garnish

DIRECTIONS

Ready the oven. Preheat to 350 degrees and place an oven rack in the middle of the oven.

To make the crust. Place the Oreos inside a large Ziploc bag. Crush them until it forms a fine crumb (you can use a food processor with a metal blade, too). Transfer the Oreo crumbs into a bowl, pour the melted butter, and add salt. Stir until crumbs are moist and coated completely.

For the cheesecake. Use a hand mixer (or stand mixer) to beat the cream cheese, sugars, cocoa powder, and salt until smooth. Add the eggs one at a time, make sure to beat in between each addition. Then, fold in the melted chocolate.

Grease a 9-inch springform pan with a  cooking spray. Pour and press the Oreo mixture in the pan and press 1/3 of the way up the sides, make sure it is tightly packed. Now, pour the cheesecake filling evenly over the crust.

Bake the cheesecake for an hour and 15 minutes or until only somewhat jiggly in the center. You can use a water bath to make sure the top of the cheesecake does not crack, just wrap the outside o the pan with aluminum foil before putting it in the baking dish. Place on the oven rack, then pour enough boiling water reaching half of the pan. And follow baking instruction. (If you use a water bath, make sure to remove the foil before putting inside the fridge until completely chilled, around 4 hours or overnight.)

To make the ganache, place the chocolate chips in a medium heatproof bowl. Set aside. In a small saucepan, place the heavy cream and heat over medium heat. Turn off the heat once bubbles begin to appear around the edge of the pan. Carefully pour the hot cream over the chocolate chips, constantly whisking until the sauce is smooth.

Now pour the ganache over the top of the cake. Decorate with chocolate shavings, then refrigerate for another 10 minutes to let the ganache set.

Death By Chocolate Cheesecake

Rebecca This recipe is a hit! I get to make this twice in a week because my kids love and crave for it always! It’s so satisfyingly delicious, you would want… Main Dish Recipes Death By Chocolate Cheesecake European Print This
Nutrition facts: 200 calories 20 grams fat
Rating: 5.0/5
( 1 voted )

Ingredients

  • COOKIE CRUST
  • 24 whole Oreo cookies
  • 6 tablespoons of melted butter
  • Pinch of kosher salt
  • CHOCOLATE CHEESECAKE
  • 4 (8-oz.) packages of cream cheese, softened to room temperature
  • 3/4 cup granulated sugar
  • 1/2 cup packed light brown sugar
  • 1/4 cup cocoa powder
  • 1/4 teaspoon kosher salt
  • 4 large eggs
  • 9 oz. bittersweet chocolate, chopped and melted
  • CHOCOLATE GANACHE
  • 1 1/2 cup of chocolate chips
  • 3/4 cup heavy cream
  • Chocolate shavings, for garnish

Instructions

Ready the oven. Preheat to 350 degrees and place an oven rack in the middle of the oven.

To make the crust. Place the Oreos inside a large Ziploc bag. Crush them until it forms a fine crumb (you can use a food processor with a metal blade, too). Transfer the Oreo crumbs into a bowl, pour the melted butter, and add salt. Stir until crumbs are moist and coated completely.

For the cheesecake. Use a hand mixer (or stand mixer) to beat the cream cheese, sugars, cocoa powder, and salt until smooth. Add the eggs one at a time, make sure to beat in between each addition. Then, fold in the melted chocolate.

Grease a 9-inch springform pan with a  cooking spray. Pour and press the Oreo mixture in the pan and press 1/3 of the way up the sides, make sure it is tightly packed. Now, pour the cheesecake filling evenly over the crust.

Bake the cheesecake for an hour and 15 minutes or until only somewhat jiggly in the center. You can use a water bath to make sure the top of the cheesecake does not crack, just wrap the outside o the pan with aluminum foil before putting it in the baking dish. Place on the oven rack, then pour enough boiling water reaching half of the pan. And follow baking instruction. (If you use a water bath, make sure to remove the foil before putting inside the fridge until completely chilled, around 4 hours or overnight.)

To make the ganache, place the chocolate chips in a medium heatproof bowl. Set aside. In a small saucepan, place the heavy cream and heat over medium heat. Turn off the heat once bubbles begin to appear around the edge of the pan. Carefully pour the hot cream over the chocolate chips, constantly whisking until the sauce is smooth.

Now pour the ganache over the top of the cake. Decorate with chocolate shavings, then refrigerate for another 10 minutes to let the ganache set.

May 4, 2020 0 comment
0 FacebookTwitterPinterestEmail
Main Dish Recipes

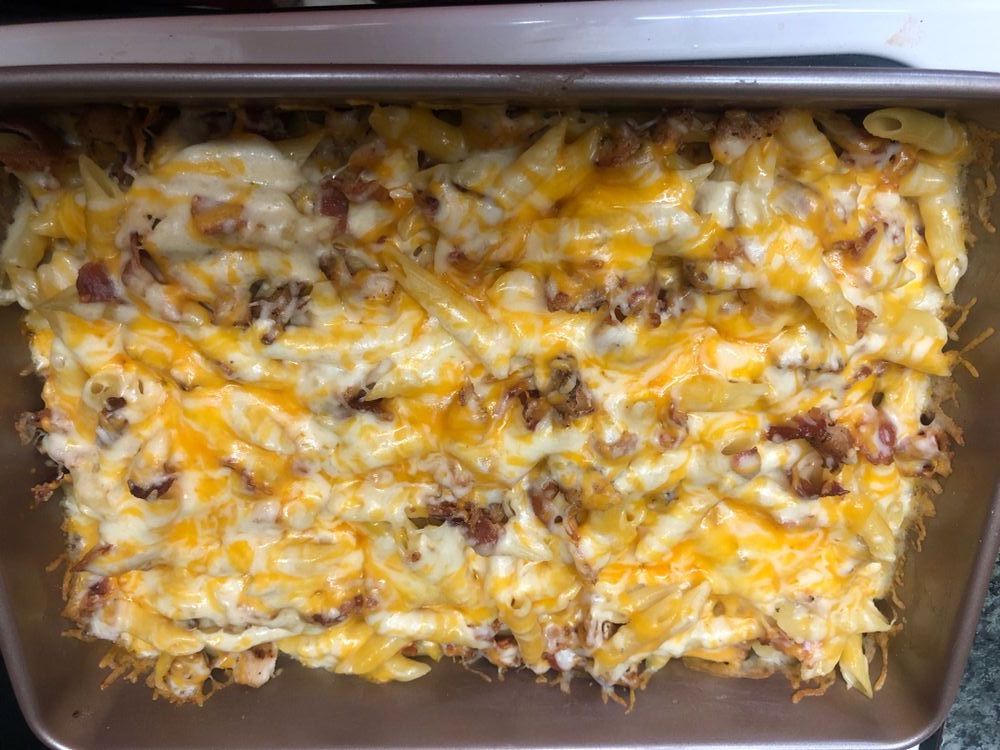
CHICKEN BACON RANCH CASSEROLE

by Rebecca May 4, 2020
written by Rebecca

Because of my busy schedule, I am always looking for quick and simple dinner ideas like this Chicken Bacon Ranch Casserole. My kids just love this dish! I usually get off work around 6 pm. I get home around 6:30 pm so I have about and 1 hr. to prepare and cook food. This is just one of those dishes that I cook on weekdays. We call it on Casserole Tuesday. Aside from the easy and instructions, the ingredients are so simple as well that you can find it at any grocery store. Just by smelling it would make you want to eat more than usual. So, control yourself. Kidding aside, Give this one a try and save a lot of time. I know you are busy too. You don’t want to stress over preparing and cooking dinner when you get home. You want to be ready to go to bed by 9 pm, right?

INGREDIENTS

10 oz Rotini, cooked and drained

12 oz Alfredo Sauce

1/3 cup Ranch Dressing

2 1/2 cup cooked and diced Chicken

1 cup shredded Mozzarella Cheese

1 cup shredded Cheddar Cheese

7 strips bacon, cooked and chopped

HOW TO MAKE CHICKEN BACON RANCH CASSEROLE

Step 1: Ready the oven. Preheat to 350 degrees.

Step 2: In a medium bowl, combine the alfredo sauce and ranch dressing.

Step 3: In another bowl, mix the shredded Mozzarella Cheese and Cheddar Cheese.

Step 4: Prepare the casserole. Rub with butter the bottom and sides of the casserole dish.

Step 5: Place half of the pasta and chicken in the prepared dish and top with half of the sauce.

Step 6: Stir the pasta and chicken to combine. Sprinkle with the other half of the cheese.

Step 7: Add the remaining of the pasta and chicken. Top with the remaining half of the sauce.

Step 8: Generously top the casserole with cheese and bacon.

Step 9: Cover and place inside the oven. Bake for 30 minutes or until the cheese is melted.

CHICKEN BACON RANCH CASSEROLE

Rebecca Because of my busy schedule, I am always looking for quick and simple dinner ideas like this Chicken Bacon Ranch Casserole. My kids just love this dish! I usually get… Main Dish Recipes CHICKEN BACON RANCH CASSEROLE European Print This
Nutrition facts: 200 calories 20 grams fat
Rating: 4.2/5
( 17 voted )

Ingredients

  • 10 oz Rotini, cooked and drained
  • 12 oz Alfredo Sauce
  • 1/3 cup Ranch Dressing
  • 2 1/2 cup cooked and diced Chicken
  • 1 cup shredded Mozzarella Cheese
  • 1 cup shredded Cheddar Cheese
  • 7 strips bacon, cooked and chopped

Instructions

Step 1: Ready the oven. Preheat to 350 degrees.

Step 2: In a medium bowl, combine the alfredo sauce and ranch dressing.

Step 3: In another bowl, mix the shredded Mozzarella Cheese and Cheddar Cheese.

Step 4: Prepare the casserole. Rub with butter the bottom and sides of the casserole dish.

Step 5: Place half of the pasta and chicken in the prepared dish and top with half of the sauce.

Step 6: Stir the pasta and chicken to combine. Sprinkle with the other half of the cheese.

Step 7: Add the remaining of the pasta and chicken. Top with the remaining half of the sauce.

Step 8: Generously top the casserole with cheese and bacon.

Step 9: Cover and place inside the oven. Bake for 30 minutes or until the cheese is melted.

May 4, 2020 0 comment
0 FacebookTwitterPinterestEmail
Main Dish Recipes

Old Fashioned Baklava

by Rebecca May 4, 2020
written by Rebecca

Thank you, Greece for this amazing Balaklava recipe! Ever since I tasted this amazingly delicious dessert, I said, I needed to know how to make it. Good thing I went to Greece last year and talked to some pastry chefs and asked for this recipe. Try this out! Another good thing about this is the filo dough. You can buy this at any department store in your area. It is not hard to find.

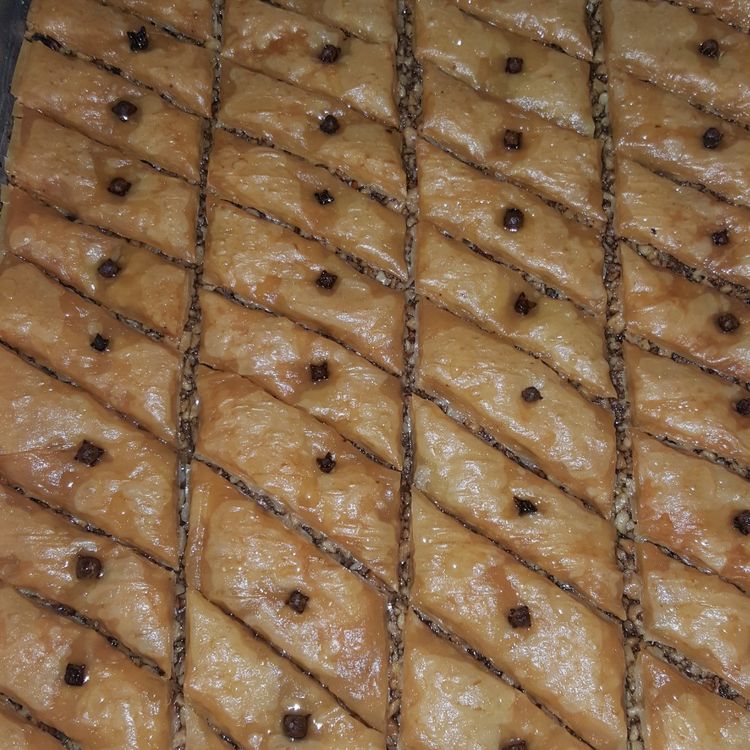
I usually let it sit overnight at room temperature so the honey can soften the layers. You would have that incredible texture to it. Oh man, looking at this picture just makes me want to bake it again! Let’s do it together! Have fun baking!

Ingredients

1 (16 oz.) package filo pastry dough, thawed

13 tbsp. melted unsalted butter, divided

4 cups walnuts, chopped finely

1 tsp. cinnamon

1 cup white sugar

2 tbsp. fresh lemon juice

3/4 cup water

1/2 cup pure honey

How to make Old Fashioned Baklava

Cut the filo pastry to 13 x 9 inches. Then, cover with a damp towel.

Grease with 1tbsp. melted butter the 13×9 inch baking dish. Set aside.

In a medium saucepan, combine the lemon juice, sugar, water, and hone. Turn the heat to medium-high and let it boil. Continue stirring for the sugar to be dissolved.

Reduce the heat to medium-low and let it simmer for 4 minutes. Don’t stir.

Move the pan away from the heat and let it cool.

Ready the oven. preheat to 325 degrees F.

Put the walnuts in a food processor until finely chopped.

In a medium bowl, add cinnamon and chopped walnuts then stir.

Place 10 filo sheets into the baking dish. (Lay one filo at a time.) Brush melted butter in between the layers of the sheets. Sprinkle about 3/4 cup of the walnut and cinnamon mixture on top of the dough. (Make sure to spread it to even layer.)

Place 5 sheets of filo dough on top of the walnut and cinnamon mixture. Brush in between layers with melted butter then sprinkles with 3/4 cup of the walnut and cinnamon mixture.

Do this procedure repeatedly until the walnut and cinnamon mixture is all used up. Lay 10 sheets of buttered filo dough on top.

Brush the top layer with melted butter. Slice into 1 1/2 inch strips. Slice diagonally to form a diamond-shaped look.

Bake in the oven for 1hr and 25 minutes uncovered or until the color turns golden.

Drizzle the top layer evenly with cooled honey syrup right after you remove it from the oven.

Let it cool before serving. Enjoy!

Old Fashioned Baklava

Rebecca Thank you, Greece for this amazing Balaklava recipe! Ever since I tasted this amazingly delicious dessert, I said, I needed to know how to make it. Good thing I went… Main Dish Recipes Old Fashioned Baklava European Print This
Nutrition facts: 200 calories 20 grams fat
Rating: 5.0/5
( 1 voted )

Ingredients

  • 1 (16 oz.) package filo pastry dough, thawed
  • 13 tbsp. melted unsalted butter, divided
  • 4 cups walnuts, chopped finely
  • 1 tsp. cinnamon
  • 1 cup white sugar
  • 2 tbsp. fresh lemon juice
  • 3/4 cup water
  • 1/2 cup pure honey

Instructions

Cut the filo pastry to 13 x 9 inches. Then, cover with a damp towel.

Grease with 1tbsp. melted butter the 13x9 inch baking dish. Set aside.

In a medium saucepan, combine the lemon juice, sugar, water, and hone. Turn the heat to medium-high and let it boil. Continue stirring for the sugar to be dissolved.

Reduce the heat to medium-low and let it simmer for 4 minutes. Don't stir.

Move the pan away from the heat and let it cool.

Ready the oven. preheat to 325 degrees F.

Put the walnuts in a food processor until finely chopped.

In a medium bowl, add cinnamon and chopped walnuts then stir.

Place 10 filo sheets into the baking dish. (Lay one filo at a time.) Brush melted butter in between the layers of the sheets. Sprinkle about 3/4 cup of the walnut and cinnamon mixture on top of the dough. (Make sure to spread it to even layer.)

Place 5 sheets of filo dough on top of the walnut and cinnamon mixture. Brush in between layers with melted butter then sprinkles with 3/4 cup of the walnut and cinnamon mixture.

Do this procedure repeatedly until the walnut and cinnamon mixture is all used up. Lay 10 sheets of buttered filo dough on top.

Brush the top layer with melted butter. Slice into 1 1/2 inch strips. Slice diagonally to form a diamond-shaped look.

Bake in the oven for 1hr and 25 minutes uncovered or until the color turns golden.

Drizzle the top layer evenly with cooled honey syrup right after you remove it from the oven.

Let it cool before serving. Enjoy!

May 4, 2020 0 comment
0 FacebookTwitterPinterestEmail
Main Dish Recipes

Chili Cheese Dog Bake!

by Rebecca May 4, 2020
written by Rebecca

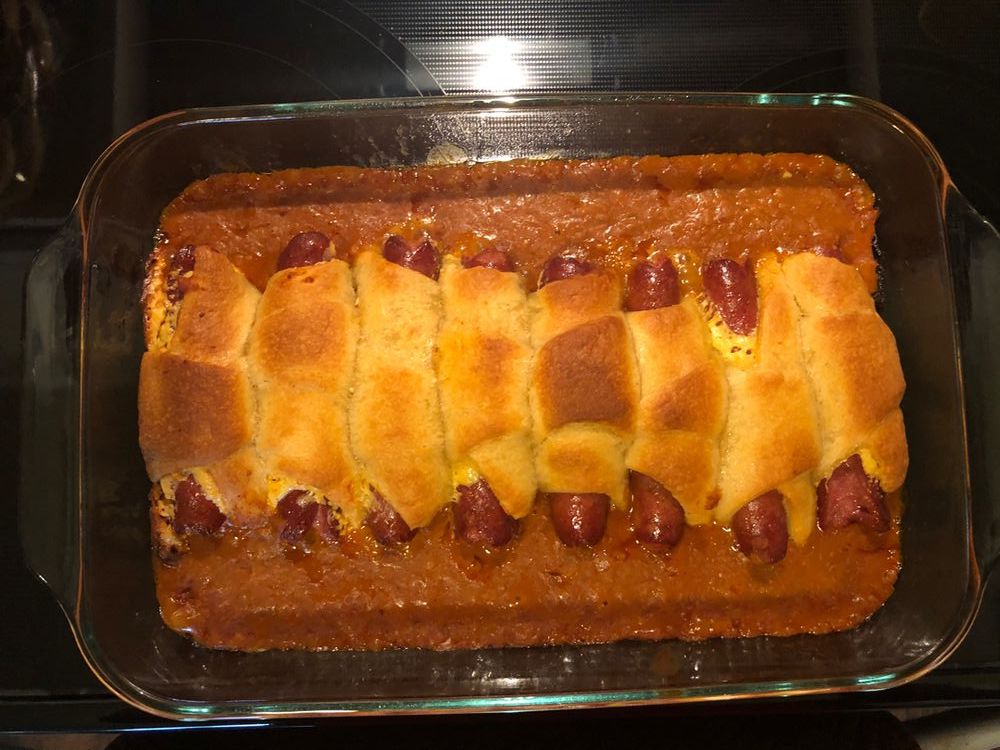
Take your hotdogs to the next level! Instead of just frying it like the conventional way, I discovered a dish that would give it a more appealing look and taste to it. This is the best seller in our house. Every time I make this amazing dish, my kids can’t get enough of it. They would go back and forth to the kitchen and see if I’m done baking. The good thing about this dish is that you can find the ingredients in your fridge. They are usually the ones you pick up when you are in the grocery store. Did I mention that it smells really good? Yes! and once you bite into that creamy dough, you just know that you did the right thing by following these simple steps. So, what are you waiting for? It’s time to bake! Enjoy!

INGREDIENTS

4 HOT DOGS

4 STRING CHEESE (CHEDDAR)

1 CAN PILLSBURY PIZZA DOUGH

1 CAN CHILI (15 OZ.)

1/4 CUP OF BUTTER, MELTED

1 TSP. GARLIC POWDER

1 TSP. FRESH PARSLEY

How to make Chili Cheese Dog

Step1: Ready the oven. Preheat to 375 degrees F.

Step 2: Place chili into a 6 x 10-inch or 7 x 11-inch pan.

Step 3: Remove wrappers and cut the cheese in half lengthwise sizes. Set aside.

Ste 4: Roll out the pizza dough and cut into 4 equal portions.

Step 5: Sandwich the hotdogs and put cheddar into 2 sides. From the side end, begin to wrap the bundle into the dough to cover the whole length of the hotdog.

Step 6: Seam side down, place in the pan with the chili.

Step 7: When all the hotdogs are completely covered in dough, place in the oven, and bake for 20-25 minutes or until the top of the dough is golden brown.

Step 8: In a small bowl, mix the garlic, parsley, and melted butter. Brush mixture at the top of the hotdogs. Serve and enjoy!

Chili Cheese Dog Bake!

Rebecca Take your hotdogs to the next level! Instead of just frying it like the conventional way, I discovered a dish that would give it a more appealing look and taste… Main Dish Recipes Chili Cheese Dog Bake! European Print This
Nutrition facts: 200 calories 20 grams fat
Rating: 5.0/5
( 1 voted )

Ingredients

  • 4 HOT DOGS
  • 4 STRING CHEESE (CHEDDAR)
  • 1 CAN PILLSBURY PIZZA DOUGH
  • 1 CAN CHILI (15 OZ.)
  • 1/4 CUP OF BUTTER, MELTED
  • 1 TSP. GARLIC POWDER
  • 1 TSP. FRESH PARSLEY

Instructions

Step1: Ready the oven. Preheat to 375 degrees F.

Step 2: Place chili into a 6 x 10-inch or 7 x 11-inch pan.

Step 3: Remove wrappers and cut the cheese in half lengthwise sizes. Set aside.

Ste 4: Roll out the pizza dough and cut into 4 equal portions.

Step 5: Sandwich the hotdogs and put cheddar into 2 sides. From the side end, begin to wrap the bundle into the dough to cover the whole length of the hotdog.

Step 6: Seam side down, place in the pan with the chili.

Step 7: When all the hotdogs are completely covered in dough, place in the oven, and bake for 20-25 minutes or until the top of the dough is golden brown.

Step 8: In a small bowl, mix the garlic, parsley, and melted butter. Brush mixture at the top of the hotdogs. Serve and enjoy!

May 4, 2020 0 comment
0 FacebookTwitterPinterestEmail
Main Dish Recipes

French Silk Pie

by Rebecca May 4, 2020
written by Rebecca

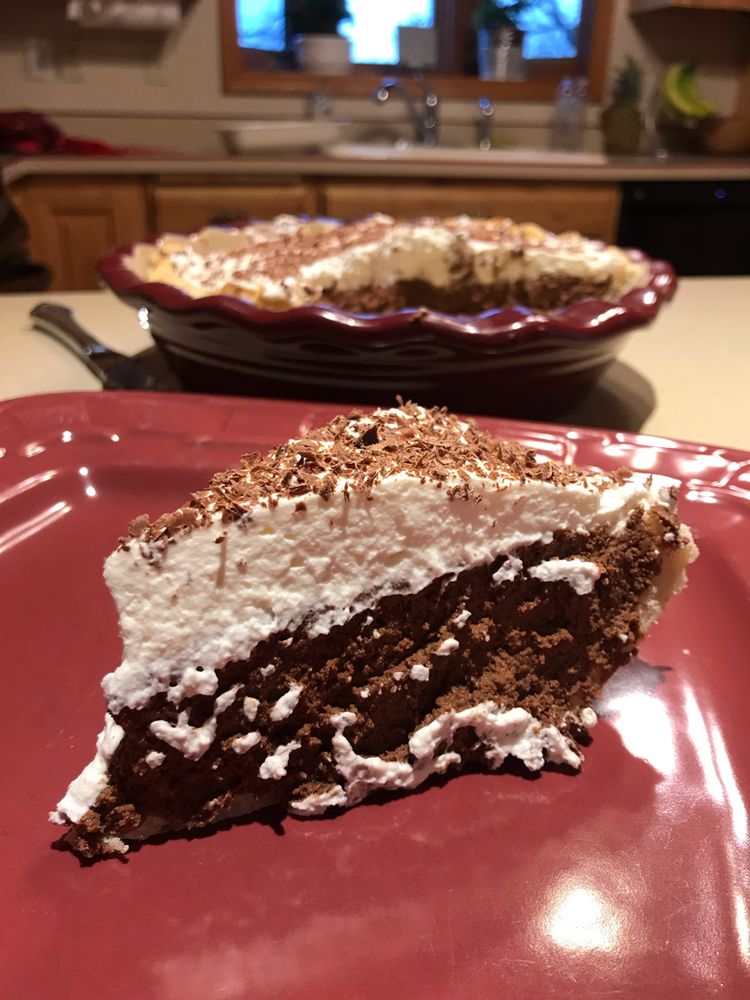
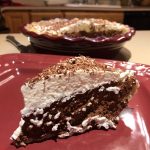
Sometimes I ask myself, what could be that one thing or reason that can bring everyone together? The past holidays were not the same as I remembered it to be. So this year, I want to bring back that feeling of completeness, pure joy. A few weeks ago, I posted that I will be making everyone’s favorite, French Silk Pie, and guess what? Everyone’s thrilled and excited, they are all coming over! Well, who can say no this beauty? It’s so creamy and smooth. Although, it does take time to make it’s all worth it!

What We Need For French Silk Pie

Pie:

Eggs

Sugar

Bittersweet chocolate

Butter

Whipping cream

Powdered sugar

Vanilla

Chocolate pie crust

Garnishment:

Whipping cream

Chocolate slivers

How to make French Silk Pie

On top of a double boiler, place the eggs, sugar, and 1 tablespoon of water.

Give It a good mix until the eggs are light yellow (usually it take 3-5 minutes).

Now, place the top broiler pan over the bottom broiler pan that has water in it.

Cook until the mixture is nice and thick or for 6-8 minutes, keep stirring.

The cooking time may take longer depending on your stove. For some it will take 20-25 minutes, so be patient because but it is worth the wait!

Once cooked. Remove the pan from the heat. Then, add the chocolates.

Put the top broiler back over the bottom broiler pan and cook for another 2 minutes. Keep stirring.

Place in the fridge until completely cooled.

Remove from the fridge. Add the butter and beat until smooth.

Place 1 cup of cream in a mixing bowl, whip until stiff peaks form, then add 3 tablespoons of powdered sugar and vanilla.

Pour into the chocolate mixture.

Combine and pour everything into the pie crust.

Garnish

In a mixing bowl, whip the other cup of the cream, then add the powdered sugar and vanilla.

Use a potato peeler, shave off pieces of a chocolate bar to sprinkle on top of the cake.

French Silk Pie

Rebecca Sometimes I ask myself, what could be that one thing or reason that can bring everyone together? The past holidays were not the same as I remembered it to be.… Main Dish Recipes French Silk Pie European Print This
Nutrition facts: 200 calories 20 grams fat
Rating: 5.0/5
( 1 voted )

Ingredients

  • Pie:
  • Eggs
  • Sugar
  • Bittersweet chocolate
  • Butter
  • Whipping cream
  • Powdered sugar
  • Vanilla
  • Chocolate pie crust
  • Garnishment:
  • Whipping cream
  • Chocolate slivers

Instructions

On top of a double boiler, place the eggs, sugar, and 1 tablespoon of water.

Give It a good mix until the eggs are light yellow (usually it take 3-5 minutes).

Now, place the top broiler pan over the bottom broiler pan that has water in it.

Cook until the mixture is nice and thick or for 6-8 minutes, keep stirring.

The cooking time may take longer depending on your stove. For some it will take 20-25 minutes, so be patient because but it is worth the wait!

Once cooked. Remove the pan from the heat. Then, add the chocolates.

Put the top broiler back over the bottom broiler pan and cook for another 2 minutes. Keep stirring.

Place in the fridge until completely cooled.

Remove from the fridge. Add the butter and beat until smooth.

Place 1 cup of cream in a mixing bowl, whip until stiff peaks form, then add 3 tablespoons of powdered sugar and vanilla.

Pour into the chocolate mixture.

Combine and pour everything into the pie crust.

Garnish

In a mixing bowl, whip the other cup of the cream, then add the powdered sugar and vanilla.

Use a potato peeler, shave off pieces of a chocolate bar to sprinkle on top of the cake.

May 4, 2020 0 comment
0 FacebookTwitterPinterestEmail
Main Dish Recipes

Blueberry Upside Down Cake

by Rebecca May 4, 2020
written by Rebecca

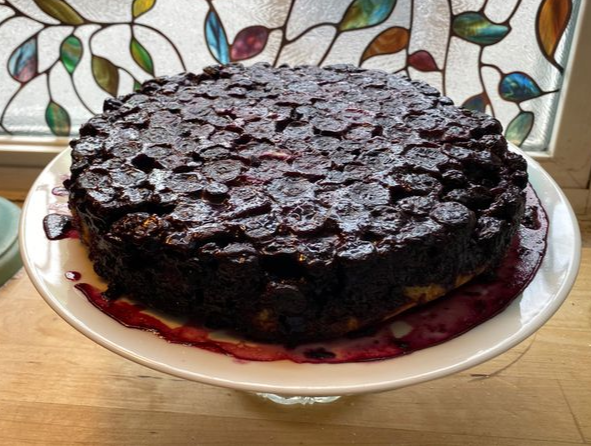
Oh, blueberries! They’re gorgeous and delicious. I used to eat them as is but learned that they’re perfect to incorporate as well in a variety of recipes. Just like blueberry soda (which is super delish), or this Blueberry Upside Down Cake. I love all sorts of cake but this one is my favorite. The berries are cook in the bottom of the cake pan, then flipped over to cover the cake in a thick topping of caramelized blueberries. A deliciously rich cake soaked in blueberries! I can never ask for any better cake than this. And it is very easy to make.

Ingredients

1/3 c brown sugar

2 Tbsp. butter

1 1/2 c blueberries

2 eggs, separated into whites and yolks

3/4 c sugar

1/2 c butter

1 tsp. vanilla

1 1/2 c flour

2 tsp. baking powder

1/2 tsp. salt

1/2 c milk

How to make Blueberry Upside Down Cake

Step 1: Ready the oven. Preheat to 350 degrees.

Step 2: To make the topping. In a small saucepan, cook the brown sugar and 2 tablespoons of butter until melted and sugar is dissolved.

Step 3: Prepare a 9-inch cake pan by spraying it with cooking spray. Pour the sugar and butter mixture, make sure to coat the bottom of the pan.

Step 4: In a single layer, top the sugar and butter mixture with fresh blueberries.

Step 5: You have to separate the egg whites and yolk. Place egg whites in a bowl, and beat at high speed until stiff peaks form. Set aside for later use.

Step 6: In a separate bowl, cream the sugar and 1/2 cup of butter. Add the egg yolks and beat well. Mix the vanilla.

Step 7: Combine the flour with the baking soda, add salt, and mix well.

Step 8: Alternately add the flour and milk to the batter.

Step 9: Now, fold the egg whites into the batter.

Step 10: Slowly pour the batter into the cake pan and spread evenly. The batter will be very thick (which is what you want), compared to a regular cake batter.

Step 11: Place in the oven. Bake for 55-60 minutes until the center of the cake is cooked.

Step 12: Remove from the oven. Let the cake cool in the pan for 15 minutes. Once cooled, flip the cake upside down onto the serving platter. Don’t remove the cake pan just yet for another 5-10 minutes to let the blueberries soak in.

Blueberry Upside Down Cake

Rebecca Oh, blueberries! They’re gorgeous and delicious. I used to eat them as is but learned that they’re perfect to incorporate as well in a variety of recipes. Just like blueberry… Main Dish Recipes Blueberry Upside Down Cake European Print This
Nutrition facts: 200 calories 20 grams fat
Rating: 5.0/5
( 1 voted )

Ingredients

  • 1/3 c brown sugar
  • 2 Tbsp. butter
  • 1 1/2 c blueberries
  • 2 eggs, separated into whites and yolks
  • 3/4 c sugar
  • 1/2 c butter
  • 1 tsp. vanilla
  • 1 1/2 c flour
  • 2 tsp. baking powder
  • 1/2 tsp. salt
  • 1/2 c milk

Instructions

Step 1: Ready the oven. Preheat to 350 degrees.

Step 2: To make the topping. In a small saucepan, cook the brown sugar and 2 tablespoons of butter until melted and sugar is dissolved.

Step 3: Prepare a 9-inch cake pan by spraying it with cooking spray. Pour the sugar and butter mixture, make sure to coat the bottom of the pan.

Step 4: In a single layer, top the sugar and butter mixture with fresh blueberries.

Step 5: You have to separate the egg whites and yolk. Place egg whites in a bowl, and beat at high speed until stiff peaks form. Set aside for later use.

Step 6: In a separate bowl, cream the sugar and 1/2 cup of butter. Add the egg yolks and beat well. Mix the vanilla.

Step 7: Combine the flour with the baking soda, add salt, and mix well.

Step 8: Alternately add the flour and milk to the batter.

Step 9: Now, fold the egg whites into the batter.

Step 10: Slowly pour the batter into the cake pan and spread evenly. The batter will be very thick (which is what you want), compared to a regular cake batter.

Step 11: Place in the oven. Bake for 55-60 minutes until the center of the cake is cooked.

Step 12: Remove from the oven. Let the cake cool in the pan for 15 minutes. Once cooled, flip the cake upside down onto the serving platter. Don't remove the cake pan just yet for another 5-10 minutes to let the blueberries soak in.

May 4, 2020 0 comment
1 FacebookTwitterPinterestEmail
Main Dish Recipes

Bacon, Egg, and Cheese Biscuit Bake

by Rebecca May 4, 2020
written by Rebecca

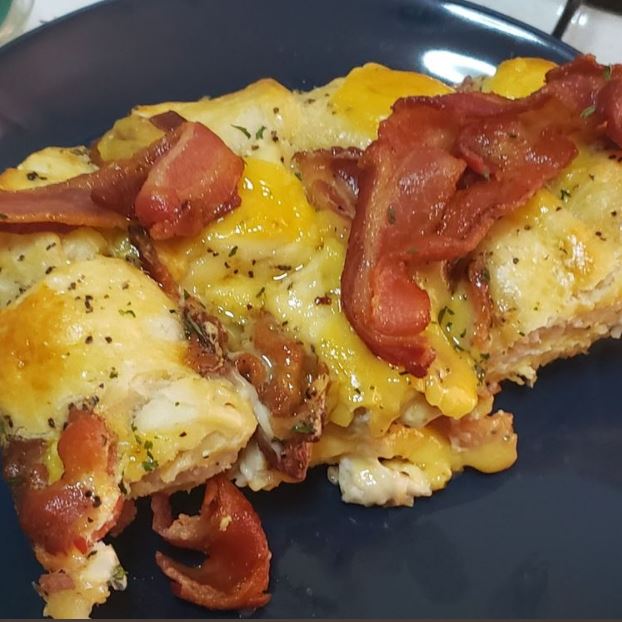
Two of my favorites are bacon and cheese. I just can’t live without them! If you will ask me to describe a perfect breakfast, it’ll be bacon, cheese, and perfectly scrambled eggs (with freshly brewed coffee, of course!). Now, I’m getting hungry again. And if you are me, who loves to eat, I am sure you’ll go crazy with this recipe I’m about to share with you all. And speaking of breakfast, this meal is perfect (even for brunch!).

This Bacon, Egg, and Cheese Biscuit is very easy to make and it is so good, your family will be asking for more!

Ingredients

8 eggs, you may also use egg substitute or egg whites

3 tbs of 2% milk

5 slices American cheese made with 2% milk (or use ¾ cup reduced-fat shredded cheddar cheese)

8 slices of center-cut bacon, uncooked

1 ½- 7.5 oz cans of buttermilk biscuits *see notes*

Salt & Pepper

Cooking Spray

How to make Bacon, Egg, and Cheese Biscuit Bake

Ready the oven. Preheat to 350 degrees.

In a skillet, fry 8 slices of bacon.

Place the eggs, milk, and salt and pepper in a medium bowl. Whisk together.

Remove the bacon from the pan, and chop into small pieces.

Add half of the chopped bacon in the same bowl with the eggs. Stir in the cut biscuits.

Grease a 9 x 13-inch casserole dish. Pour the mixture onto the greased pan and spread evenly.

Place in the preheated oven. Bake for 20 minutes, uncovered.

Grab 5 slices of American cheese. Cut them into small bite-size squares (you can use 3/4 cups of shredded cheddar, too). Set aside.

Once done baking. Remove the dish from the oven. Scatter the remaining bacon and the shredded or cut cheese on top. Place dish in the oven, then, bake for another 10 minutes.

Cut the baked bacon, egg, and cheese into six slices, serve, and enjoy!

Bacon, Egg, and Cheese Biscuit Bake

Rebecca Two of my favorites are bacon and cheese. I just can’t live without them! If you will ask me to describe a perfect breakfast, it’ll be bacon, cheese, and perfectly… Main Dish Recipes Bacon, Egg, and Cheese Biscuit Bake European Print This
Nutrition facts: 200 calories 20 grams fat
Rating: 3.8/5
( 127 voted )

Ingredients

  • 8 eggs, you may also use egg substitute or egg whites
  • 3 tbs of 2% milk
  • 5 slices American cheese made with 2% milk (or use ¾ cup reduced-fat shredded cheddar cheese)
  • 8 slices of center-cut bacon, uncooked
  • 1 ½- 7.5 oz cans of buttermilk biscuits *see notes*
  • Salt & Pepper
  • Cooking Spray

Instructions

Ready the oven. Preheat to 350 degrees.

In a skillet, fry 8 slices of bacon.

Place the eggs, milk, and salt and pepper in a medium bowl. Whisk together.

Remove the bacon from the pan, and chop into small pieces.

Add half of the chopped bacon in the same bowl with the eggs. Stir in the cut biscuits.

Grease a 9 x 13-inch casserole dish. Pour the mixture onto the greased pan and spread evenly.

Place in the preheated oven. Bake for 20 minutes, uncovered.

Grab 5 slices of American cheese. Cut them into small bite-size squares (you can use 3/4 cups of shredded cheddar, too). Set aside.

Once done baking. Remove the dish from the oven. Scatter the remaining bacon and the shredded or cut cheese on top. Place dish in the oven, then, bake for another 10 minutes.

Cut the baked bacon, egg, and cheese into six slices, serve, and enjoy!

May 4, 2020 0 comment
0 FacebookTwitterPinterestEmail
Main Dish Recipes

Melt in your Mouth Strawberry Buttermilk Pound Cake

by Rebecca May 2, 2020
written by Rebecca

One of the richest but most comfortable desserts ever is a pound cake. A slice of good pound cake can be related to everyone. Perhaps it reminds you of a young person or a loved one who bakes for you. The melt in your mouth strawberry buttermilk pound cake is quite awesome. The intensive flavour of strawberry and the ultra-moist cake make a winner. This melt is the last of a series of test pound cake recipes in your mouth strawberry buttermilk pound cake.

This cake is so simple and very, very tasty, especially eaten with a scoop of homemade vanilla ice cream while you’re resting and chilling with your family. The strawberries are chopped into the batter, small and folded. You compliment the dense cake very much. Do you know that when you eat a poundcake, your mouth begs for a little surprise and pleasure (and some juice in it)? Well, that’s what these juicy little strawberries are all about.

Ingredients:

1/2 cup shortening

1/2 cup butter

2 cups granulated sugar

3-ounce package strawberry gelatin I used Jello brand

5 large eggs at room temperature

1 c buttermilk at room temperature (you can use whole milk too)

3 cups all-purpose flour

1/2 teaspoon salt

2 and 1/2 teaspoon baking powder

1 tablespoon vanilla extract

Directions:

Sift together the flour, salt, and baking powder.

Preheat oven to about 325 degrees Prepare a 10-inch saucepan, then add either sugar or flour, with solid vegetable shortening.

Cream the shortening and add butter in a bowl of a standing blender. Add sugar and mix until it’s smooth.

Next, blend the eggs one by one until the batter is yellow. In the batter, add vanilla and mix.

Fill the flour mixture with strawberry gelatine. Whisk properly until combine

Add flour mixture to buttermilk alternately. Make sure to start and end with flour mixture.

Pour the batter and a smooth top into a bundt.

Cook for 65 to 70 minutes in a 325-degree oven.

Set aside the cake for 10-15 minutes or until it’s cool then carefully place it in the tray.

Melt in your Mouth Strawberry Buttermilk Pound Cake

Rebecca One of the richest but most comfortable desserts ever is a pound cake. A slice of good pound cake can be related to everyone. Perhaps it reminds you of a… Main Dish Recipes Melt in your Mouth Strawberry Buttermilk Pound Cake European Print This
Nutrition facts: 200 calories 20 grams fat
Rating: 4.4/5
( 5 voted )

Ingredients

  • 1/2 cup shortening
  • 1/2 cup butter
  • 2 cups granulated sugar
  • 3-ounce package strawberry gelatin I used Jello brand
  • 5 large eggs at room temperature
  • 1 c buttermilk at room temperature (you can use whole milk too)
  • 3 cups all-purpose flour
  • 1/2 teaspoon salt
  • 2 and 1/2 teaspoon baking powder
  • 1 tablespoon vanilla extract

Instructions

Sift together the flour, salt, and baking powder.

Preheat oven to about 325 degrees Prepare a 10-inch saucepan, then add either sugar or flour, with solid vegetable shortening.

Cream the shortening and add butter in a bowl of a standing blender. Add sugar and mix until it's smooth.

Next, blend the eggs one by one until the batter is yellow. In the batter, add vanilla and mix.

Fill the flour mixture with strawberry gelatine. Whisk properly until combine

Add flour mixture to buttermilk alternately. Make sure to start and end with flour mixture.

Pour the batter and a smooth top into a bundt.

Cook for 65 to 70 minutes in a 325-degree oven.

Set aside the cake for 10-15 minutes or until it's cool then carefully place it in the tray.

May 2, 2020 0 comment
0 FacebookTwitterPinterestEmail
Newer Posts
Older Posts

Popular Posts

  • 1

    Crispy Crunchy Parmesan Potatoes

    March 21, 2020
  • 2

    CROCK POT SMOTHERED PORK CHOPS

    March 21, 2020
  • Facebook
  • Twitter

@2019 - All Right Reserved.


Back To Top