Cook it once
  • Home
  • Privacy Policy
  • Recipes
    • KETO
    • LC
    • WW
  • Tips
  • Contact
Cook it once
  • Home
  • Privacy Policy
  • Recipes
    • KETO
    • LC
    • WW
  • Tips
  • Contact
Monthly Archives

April 2020

Main Dish Recipes

GROUND BEEF ENCHILADAS RECIPE

by Rebecca April 27, 2020
written by Rebecca

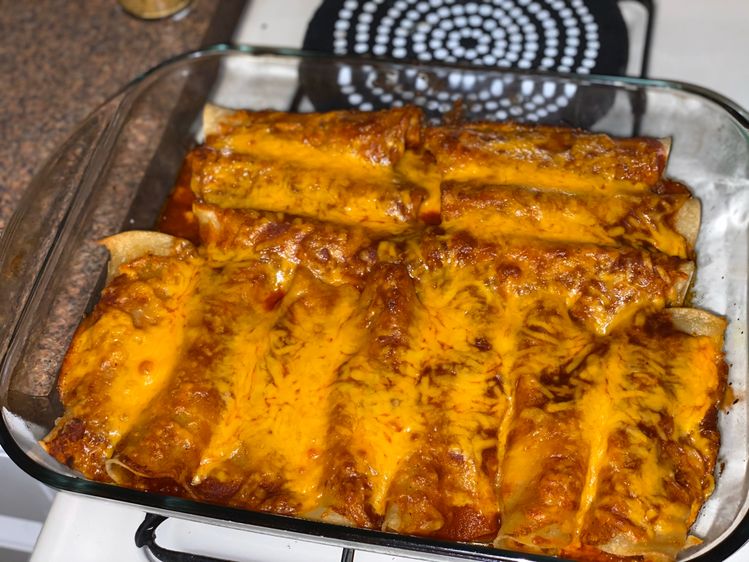
If I have one dish that I can probably eat every day, all day, that is enchilada! I love how tasty and easy this recipe is. All the ingredients you can probably have in your kitchen!

Ingredients

1 Tbsp vegetable oil plus additional for frying the tortillas

1/2 cup onion finely diced

1 jalapeno minced and seeds removed

4 cloves of garlic minced

1 pound 93/7 lean ground beef

1 cup beef broth low sodium

2 8 oz cans of tomato sauce good quality

2 Tbsp chilli powder

1 tsp smoked paprika

1 Tbsp sugar

1 tsp cumin

1 tsp kosher salt

1/2 tsp freshly ground black pepper

2 Tbsp cilantro chopped

12 corn tortillas

16 oz of Colby-jack cheese shredded

sour cream for serving

How to cook Ground Beef Enchiladas Recipe

In a large pan, sauté onions and jalapeño over medium-low heat for about 2-3 minutes or until onions start to soften and turn translucent. Stir in the garlic and cook for 1 more minute. You have to increase the heat upon adding the ground beef. Once ground beef is cooked, add the beef broth, tomato sauce, chilli powder, sugar, cumin, salt, and pepper. Give it a good stir to combine. Let it simmer over low heat for 10 minutes or until the sauce has reduced slightly.

Grab another skillet, pour, and heat and vegetable oil for lightly frying corn tortillas. Make sure that tortillas should still be pliable for rolling. Set tortillas aside with paper towels between each layer.

Going back to the sauce. Once the sauce has reduced slightly, stir in 2 tablespoons of chopped fresh cilantro.

Now, preheat oven to 400 degrees to prepare for baking. Spray non stick cooking spray on a 9×13-inch baking dish.

This is the fun part! To assemble enchiladas, let’s start by adding 1/2 cup of enchilada sauce mixture in the bottom of the baking pan. I advise that you use a slotted spoon to evenly divide the meat mixture into each of the tortillas. Then divide 8 oz of cheese between all 12 enchiladas, roll and place seam side down in the baking dish. Pour the remaining enchilada sauce over rolled enchiladas. Don’t forget to top them with the remaining cheese!

Let’s put those babies in the oven! First cover dish with foil put in the microwave and bake at 400 degrees for 20-30 minutes or until heated through and bubbly.

Finally, it’s done! Smell that? It’s heaven! But before serving I suggest sprinkling it with additional fresh cilantro and sour cream.

GROUND BEEF ENCHILADAS RECIPE

Rebecca If I have one dish that I can probably eat every day, all day, that is enchilada! I love how tasty and easy this recipe is. All the ingredients you… Main Dish Recipes GROUND BEEF ENCHILADAS RECIPE European Print This
Nutrition facts: 200 calories 20 grams fat
Rating: 5.0/5
( 1 voted )

Ingredients

  • 1 Tbsp vegetable oil plus additional for frying the tortillas
  • 1/2 cup onion finely diced
  • 1 jalapeno minced and seeds removed
  • 4 cloves of garlic minced
  • 1 pound 93/7 lean ground beef
  • 1 cup beef broth low sodium
  • 2 8 oz cans of tomato sauce good quality
  • 2 Tbsp chilli powder
  • 1 tsp smoked paprika
  • 1 Tbsp sugar
  • 1 tsp cumin
  • 1 tsp kosher salt
  • 1/2 tsp freshly ground black pepper
  • 2 Tbsp cilantro chopped
  • 12 corn tortillas
  • 16 oz of Colby-jack cheese shredded
  • sour cream for serving

Instructions

In a large pan, sauté onions and jalapeño over medium-low heat for about 2-3 minutes or until onions start to soften and turn translucent. Stir in the garlic and cook for 1 more minute. You have to increase the heat upon adding the ground beef. Once ground beef is cooked, add the beef broth, tomato sauce, chilli powder, sugar, cumin, salt, and pepper. Give it a good stir to combine. Let it simmer over low heat for 10 minutes or until the sauce has reduced slightly.

Grab another skillet, pour, and heat and vegetable oil for lightly frying corn tortillas. Make sure that tortillas should still be pliable for rolling. Set tortillas aside with paper towels between each layer.

Going back to the sauce. Once the sauce has reduced slightly, stir in 2 tablespoons of chopped fresh cilantro.

Now, preheat oven to 400 degrees to prepare for baking. Spray non stick cooking spray on a 9x13-inch baking dish.

This is the fun part! To assemble enchiladas, let's start by adding 1/2 cup of enchilada sauce mixture in the bottom of the baking pan. I advise that you use a slotted spoon to evenly divide the meat mixture into each of the tortillas. Then divide 8 oz of cheese between all 12 enchiladas, roll and place seam side down in the baking dish. Pour the remaining enchilada sauce over rolled enchiladas. Don't forget to top them with the remaining cheese!

Let's put those babies in the oven! First cover dish with foil put in the microwave and bake at 400 degrees for 20-30 minutes or until heated through and bubbly.

Finally, it's done! Smell that? It's heaven! But before serving I suggest sprinkling it with additional fresh cilantro and sour cream.
April 27, 2020 0 comment
1 FacebookTwitterPinterestEmail
Main Dish Recipes

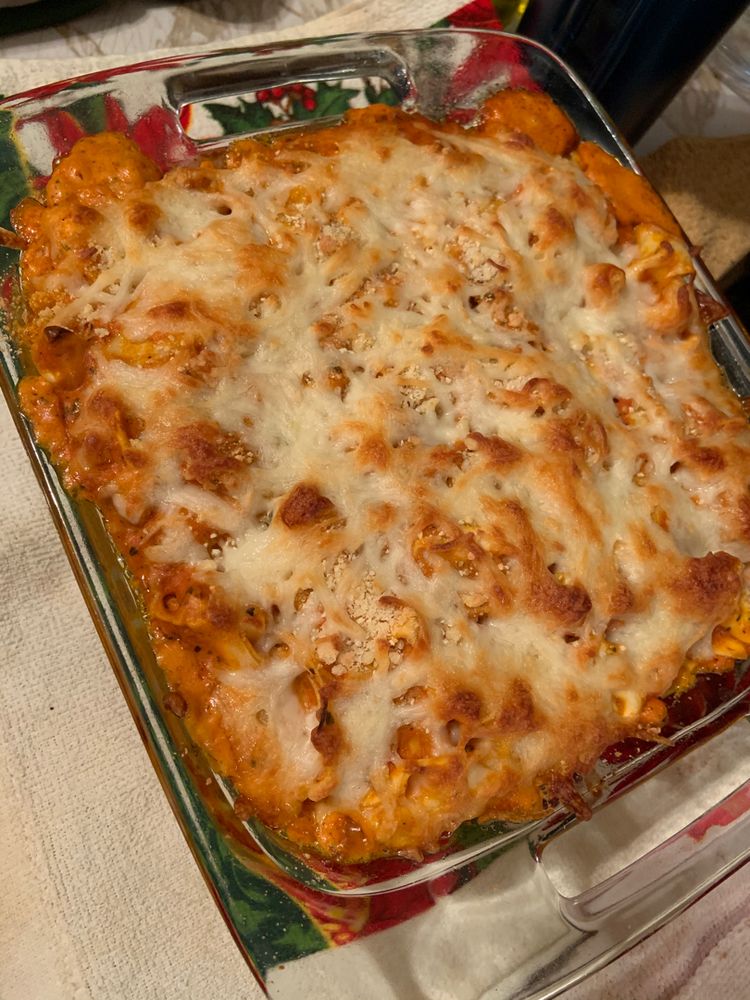
Easy Cheesy Baked Tortellini (With Meat Sauce)

by Rebecca April 27, 2020
written by Rebecca

Hi there! Okay, so last week was my husband’s birthday. I asked him where do you want to eat? He says “Honey, we are in lockdown. We’re not going anywhere.” I replied, “I know. That’s why I’m gonna bring the restaurant here.” We had a good laugh and I thought of this recipe because it was the first food we ate together. Aww! Yeah, this dish will always have a special place in our hearts and stomach! I know that once you tasted this, it will also have one in yours. It’s a blessing to have someone in your life that loves you unconditionally. The best way to appreciate it is to love them back and fill their stomach with good food! Enjoy this recipe. Have a wonderful day!

Ingredients

1 (20oz) container of refrigerated or frozen cheese tortellini

1 lb ground beef

1 (24oz) jar of tomato sauce

8 (ounces) cream cheese (cubed)

1-2 cups of shredded mozzarella cheese

1/2 cup of grated or shredded parmesan

seasoning to taste

Instructions

Cook the pasta for 8-10 minutes or see the directions on the package. Drain water and set aside first.

Grease your 9×13-inch baking dish or any size you have at home. Preheat the oven to 350 degrees C.

Cook the ground beef into a large skillet until the colour turns brown. Season with salt and pepper. (You can add garlic powder or any flavour you want to)

When the ground beef has turned brown, remove the excess grease and pour in the tomato sauce and cream cheese then, stir. Simmer for at least 5 minutes or until sauce is well-mixed.

Toss in the cooked tortellini into the sauce. Slowly pour the sauce into your casserole dish and top with the parmesan and shredded mozzarella.

Place the casserole dish at the centre of your oven and bake for 20 minutes. (Do not cover the casserole.)

Bake for another 2 minutes in a broil or until the cheese is almost brown.

Best served with garlic bread or salad! Enjoy!

Easy Cheesy Baked Tortellini (With Meat Sauce)

Rebecca Hi there! Okay, so last week was my husband’s birthday. I asked him where do you want to eat? He says “Honey, we are in lockdown. We’re not going anywhere.”… Main Dish Recipes Easy Cheesy Baked Tortellini (With Meat Sauce) European Print This
Nutrition facts: 200 calories 20 grams fat
Rating: 5.0/5
( 1 voted )

Ingredients

  • 1 (20oz) container of refrigerated or frozen cheese tortellini
  • 1 lb ground beef
  • 1 (24oz) jar of tomato sauce
  • 8 (ounces) cream cheese (cubed)
  • 1-2 cups of shredded mozzarella cheese
  • 1/2 cup of grated or shredded parmesan
  • seasoning to taste

Instructions

Cook the pasta for 8-10 minutes or see the directions on the package. Drain water and set aside first.

Grease your 9x13-inch baking dish or any size you have at home. Preheat the oven to 350 degrees C.

Cook the ground beef into a large skillet until the colour turns brown. Season with salt and pepper. (You can add garlic powder or any flavour you want to)

When the ground beef has turned brown, remove the excess grease and pour in the tomato sauce and cream cheese then, stir. Simmer for at least 5 minutes or until sauce is well-mixed.

Toss in the cooked tortellini into the sauce. Slowly pour the sauce into your casserole dish and top with the parmesan and shredded mozzarella.

Place the casserole dish at the centre of your oven and bake for 20 minutes. (Do not cover the casserole.)

Bake for another 2 minutes in a broil or until the cheese is almost brown.

Best served with garlic bread or salad! Enjoy!

April 27, 2020 0 comment
0 FacebookTwitterPinterestEmail
Main Dish RecipesTips

Cowboy Baked Beans

by Rebecca April 27, 2020
written by Rebecca

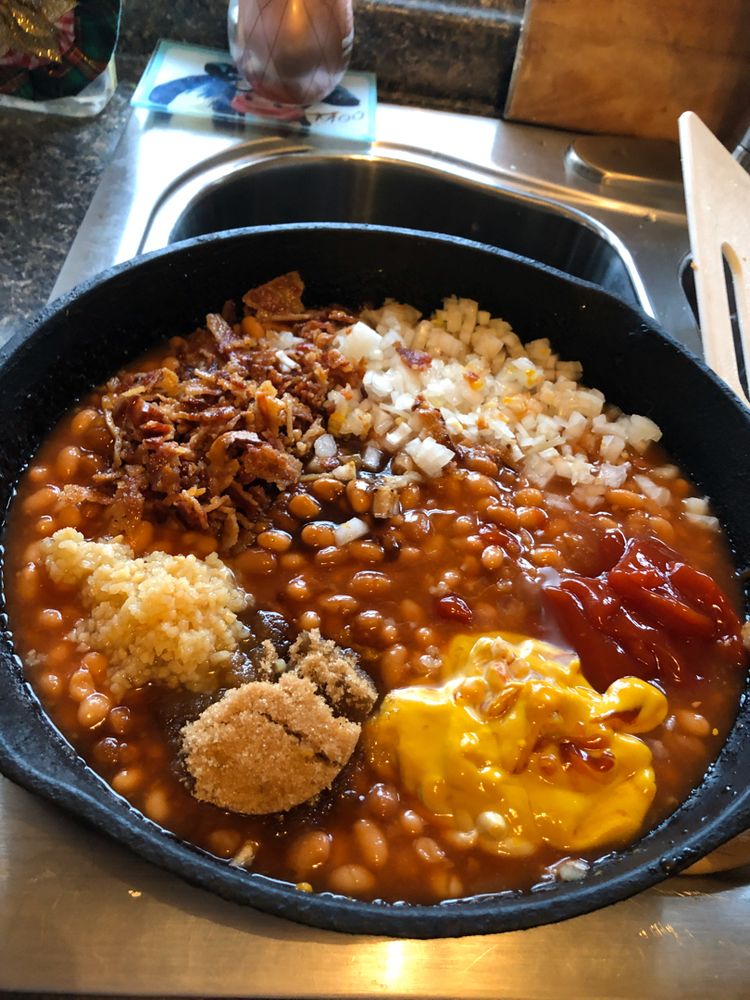
This Pandemic has taught me a lot of things and one of those is to be resourceful when it comes to the food source. This recipe is not only easy and simple to make but it is also a very cheap dish. Who would have thought that canned baked beans could be something so fancy looking dish to eat? I kid you not. When I first ate this, it tasted like something you can order at a Michelin Starred restaurant. Okay, maybe I’m overselling it but trust me, this will blow your mind and your taste buds! Because malls and groceries are closed, I needed to come up with something amazing that is available at home. I needed my husband and kids not to miss those restaurants and take-outs. So, the good thing is that we actually have these ingredients. Awesome! I remember my son pouting at first when I told him that what we had for dinner was canned baked beans. Little did he know that it was a completely modified version of canned baked beans. He was so surprised that it was really good! Check your drawers and fridge if you have these ingredients because if you do, oh boy, You are in for a treat!

Ingredients

1 28 oz of can baked beans

6 slices of cooked bacon chopped in 1/4 inch pieces

1/2 red onion diced

1/4 cup ketchup

1/4 cup yellow mustard

1/4 cup brown sugar

2 tbsp molasses

2 tbsp minced garlic

1 tbsp of Worcestershire sauce

Instructions

Ready the oven and preheat to 350 degrees C.

Add all the ingredients in an oven-safe baking dish. (Casserole dish, Cast iron pan, etc.) Stir until all the ingredients are completely incorporated.

Let it sit in the oven for 1 hour to bake to perfection. Stir halfway through to the cooking process. In a slow cooker, set the time to 4 hours for high and 8 hours for low.

Best served hot!

Cowboy Baked Beans

Rebecca This Pandemic has taught me a lot of things and one of those is to be resourceful when it comes to the food source. This recipe is not only easy… Main Dish Recipes Cowboy Baked Beans European Print This
Nutrition facts: 200 calories 20 grams fat
Rating: 5.0/5
( 1 voted )

Ingredients

  • 1 28 oz of can baked beans
  • 6 slices of cooked bacon chopped in 1/4 inch pieces
  • 1/2 red onion diced
  • 1/4 cup ketchup
  • 1/4 cup yellow mustard
  • 1/4 cup brown sugar
  • 2 tbsp molasses
  • 2 tbsp minced garlic
  • 1 tbsp of Worcestershire sauce

Instructions

Ready the oven and preheat to 350 degrees C.

Add all the ingredients in an oven-safe baking dish. (Casserole dish, Cast iron pan, etc.) Stir until all the ingredients are completely incorporated.

Let it sit in the oven for 1 hour to bake to perfection. Stir halfway through to the cooking process. In a slow cooker, set the time to 4 hours for high and 8 hours for low.

Best served hot!

April 27, 2020 0 comment
0 FacebookTwitterPinterestEmail
Main Dish Recipes

Old School Butter Pound Cake

by Rebecca April 27, 2020
written by Rebecca

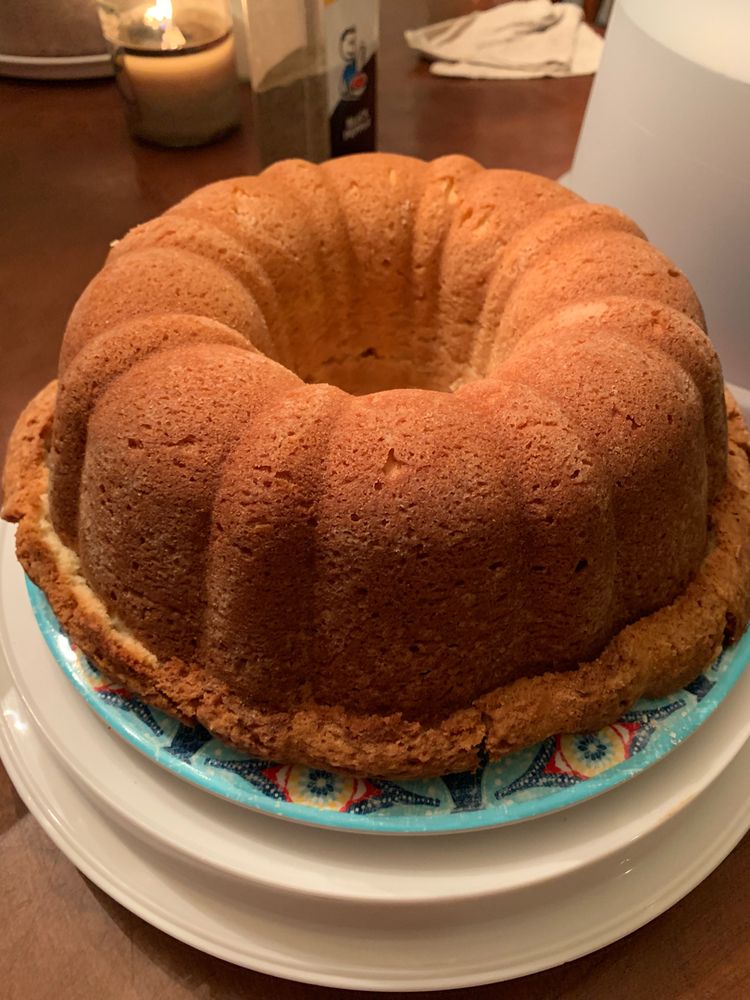
Old but Gold! Everybody wants a good tasting cake. Well, who doesn’t? When I was a kid I’ve always wanted to learn how to bake. I remember watching my mom worked around the kitchen and saying I want to be just like her when I grow up. She taught me everything in life including this recipe. I can say that I was trained by the best cook. This recipe is not complicated though. I am 100% sure that you can do this. This will only take about 2 hours to bake and I promise it is worth your time. I taught my kid this recipe and after 2 tries, (and a thousand mess in the kitchen) she was able to make a Butter pound cake. I was so proud and so was she. So, what are you waiting for? It’s time to go to the kitchen and let the Baking Wizard out of you!

You will surely love this recipe! Enjoy!

Ingredients

1 1/2 cups cake flour

1 1/2 cups of all-purpose flour

3 sticks butter, unsalted (softened at room temp)

8 oz cream cheese, room temperature

3 1/4 cups sugar

1 1/2 tsp vanilla extract

1 1/2 tsp almond extract

1 tsp salt

6 large eggs

How to cook Old School Butter Pound Cake

Using a mixer, beat the cream cheese and butter until creamy and smooth.

Add the sugar, vanilla extract, and almond extract.

Now, beat slowly until it becomes light and fluffy.

Add eggs and flour alternately. 1 egg is to 1/2 cup of flour. Continue this method until eggs and flour are all used.

Grease the 10-cup Bundt pan. Also, add flour.

Pour in the batter into the Bundt pan.

Prepare the oven. Bake for about 1 1/2 hours at a 325 degrees C. If the tester comes out clean, you are done! (You can use a toothpick as a tester.)

Remove the cake from the pan and let it sit on the wire rack to cool.

Old School Butter Pound Cake

Rebecca Old but Gold! Everybody wants a good tasting cake. Well, who doesn’t? When I was a kid I’ve always wanted to learn how to bake. I remember watching my mom… Main Dish Recipes Old School Butter Pound Cake European Print This
Nutrition facts: 200 calories 20 grams fat
Rating: 5.0/5
( 1 voted )

Ingredients

  • 1 1/2 cups cake flour
  • 1 1/2 cups of all-purpose flour
  • 3 sticks butter, unsalted (softened at room temp)
  • 8 oz cream cheese, room temperature
  • 3 1/4 cups sugar
  • 1 1/2 tsp vanilla extract
  • 1 1/2 tsp almond extract
  • 1 tsp salt
  • 6 large eggs

Instructions

Using a mixer, beat the cream cheese and butter until creamy and smooth.

Add the sugar, vanilla extract, and almond extract.

Now, beat slowly until it becomes light and fluffy.

Add eggs and flour alternately. 1 egg is to 1/2 cup of flour. Continue this method until eggs and flour are all used.

Grease the 10-cup Bundt pan. Also, add flour.

Pour in the batter into the Bundt pan.

Prepare the oven. Bake for about 1 1/2 hours at a 325 degrees C. If the tester comes out clean, you are done! (You can use a toothpick as a tester.)

Remove the cake from the pan and let it sit on the wire rack to cool.

April 27, 2020 0 comment
0 FacebookTwitterPinterestEmail
Main Dish Recipes

Sausage and Rice Casserole

by Rebecca April 27, 2020
written by Rebecca

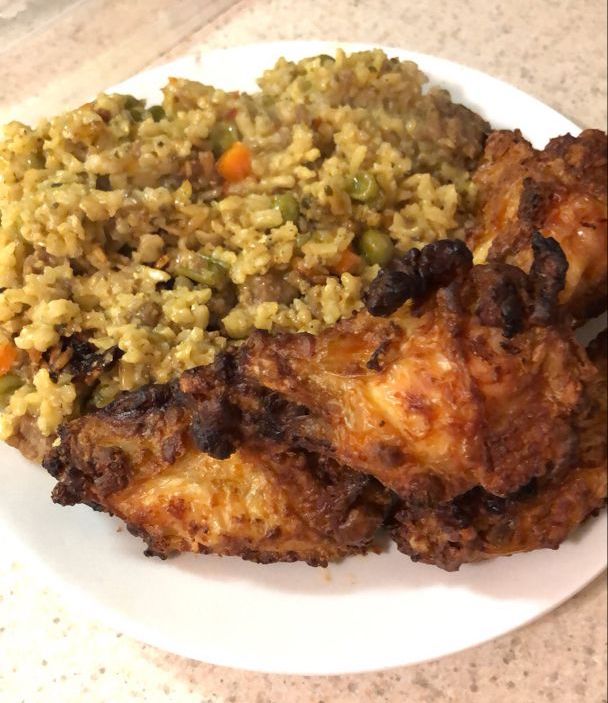
What kind of sausage is your favourite? Well, it doesn’t matter because in this recipe you can use all kinds of sausages. Breakfast, lunch, or dinner, this dish will surely be a part of your day 2 or 3 times a week! Yeah, it’s that good! A very simple yet satisfying dish that you and your family or friends will enjoy! Just the other day I had friends over so I figured maybe I can cook this recipe. It was a hit! One friend of mine was even asking me for more but there was nothing left. So, I just gave her my recipe so she can cook whenever she craves for a nice sausage and rice casserole. I cannot oversell this enough. So start by looking for rice. Do you have it? Yeah? Perfect! This will only take 1 hour to prepare and cook. Very hassle-free and very delicious! Happy cooking!

Ingredients

1 1/2 lb of hot breakfast sausage

1 small onion, chopped

1 stalk(s) celery, chopped

1 half, red bell pepper, chopped

1 1/4 cups of uncooked jasmine rice or reg. long-grain rice

10 1/2 oz can cream of mushroom soup

2 cups chicken stock

3/4 cup shredded Colby jack cheese

Instructions

Cook the sausage in a large-sized skillet on medium heat until it turns brown.

Smash the sausage as it cooks using a wooden spoon.

Let the sausage render its fat. (Cook it on its natural oil.)

Toss in the chopped onion, celery, and bell pepper. Sautee for 5 minutes.

Toss in the uncooked rice. Stir until all the ingredients are well-mixed.

In a small bowl, mix the soup and broth. Whisk until it is well-mixed and pour it in the skillet with all the other ingredients.

Add the cheese and stir to combine well.

Lightly grease the 2.5 quarts baking dish.

Pour in the casserole.

Tightly cover with tinfoil.

Bake in the oven at 350 degrees C for 1 hour.

Sausage and Rice Casserole

Rebecca What kind of sausage is your favourite? Well, it doesn’t matter because in this recipe you can use all kinds of sausages. Breakfast, lunch, or dinner, this dish will surely… Main Dish Recipes Sausage and Rice Casserole European Print This
Nutrition facts: 200 calories 20 grams fat
Rating: 5.0/5
( 1 voted )

Ingredients

  • 1 1/2 lb of hot breakfast sausage
  • 1 small onion, chopped
  • 1 stalk(s) celery, chopped
  • 1 half, red bell pepper, chopped
  • 1 1/4 cups of uncooked jasmine rice or reg. long-grain rice
  • 10 1/2 oz can cream of mushroom soup
  • 2 cups chicken stock
  • 3/4 cup shredded Colby jack cheese

Instructions

Cook the sausage in a large-sized skillet on medium heat until it turns brown.

Smash the sausage as it cooks using a wooden spoon.

Let the sausage render its fat. (Cook it on its natural oil.)

Toss in the chopped onion, celery, and bell pepper. Sautee for 5 minutes.

Toss in the uncooked rice. Stir until all the ingredients are well-mixed.

In a small bowl, mix the soup and broth. Whisk until it is well-mixed and pour it in the skillet with all the other ingredients.

Add the cheese and stir to combine well.

Lightly grease the 2.5 quarts baking dish.

Pour in the casserole.

Tightly cover with tinfoil.

Bake in the oven at 350 degrees C for 1 hour.

April 27, 2020 0 comment
0 FacebookTwitterPinterestEmail
Main Dish Recipes

Best Chocolate Cake Ever

by Rebecca April 27, 2020
written by Rebecca

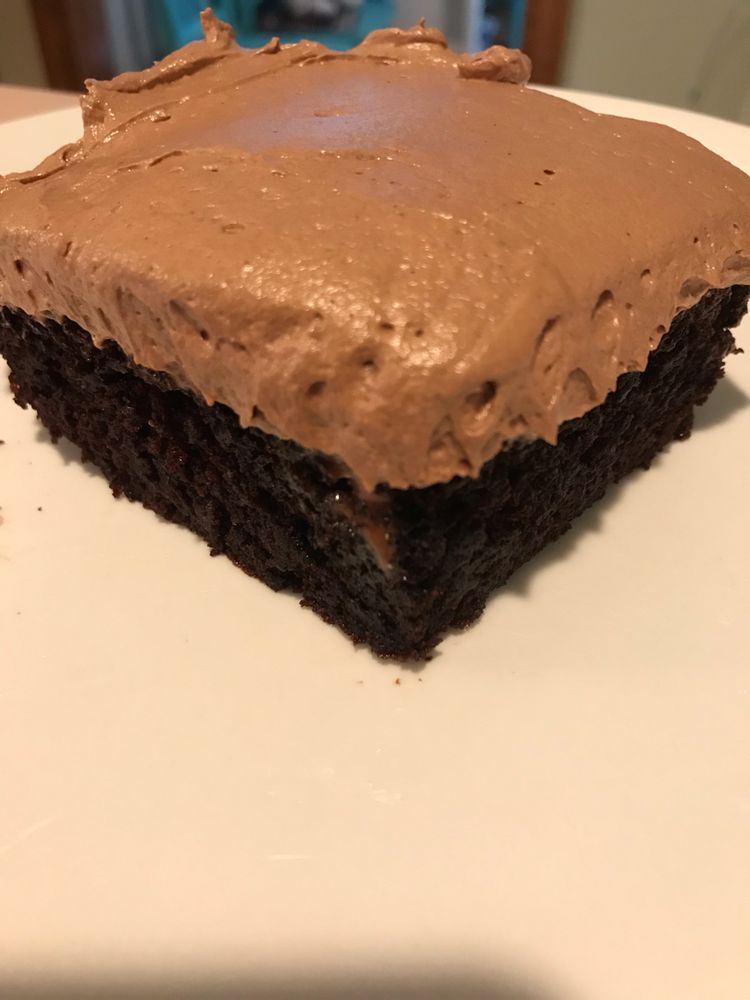
The best gift to give to someone special on their birthday is something personal and authentic (and sweet!). There is no better than baking a cake for that special person. Try this incredible recipe and I am sure they are gonna love it! I made one last week. It was my best friend’s birthday and she insisted that I should bake the same cake that I gave her last year. To make the story short, she loves it and appreciates it every time! And this recipe will only take less than an hour to bake. So, take a look at your reminders on your calendar and see if a birthday is coming up! Have fun baking!

Ingredients

1 3/4 cup all-purpose flour

2 cups of sugar

3/4 cup cocoa powder

2 tsp. baking soda

1 tsp. baking powder

1 tsp. salt

2 eggs

1 cup of strong black coffee, cooled

1 cup buttermilk

1/2 cup vegetable oil

1 tsp. of real vanilla extract

CHOCOLATE FROSTING

1/2 cup margarine, softened

2 oz melted unsweetened chocolate, cooled

3 cups powdered sugar

3 Tbsp milk

2 tsp. real vanilla extract

How to Make the Best Chocolate Cake Ever

In a large-sized mixing bowl, combine sugar, flour, cocoa, baking soda, baking powder, and salt. Or if you have a stand mixer, feel free to use it.

Add buttermilk, coffee, eggs, oil, and vanilla in the same mixing bowl and beat for 2 minutes at medium speed until the batter is thin and smooth.

Ready the 9×13-inch pan or two 9-inch cake pans. Make sure to grease them first before pouring the batter.

Baking time is 35 to 40 minutes at 350 degrees C for a 9×13-inch pan. For a 9-inch cake pan, the baking time is 30 to 35 minutes.

Using a stand mixer, combine all frosting ingredients. (You may also use your hand to mix the ingredients.)

When the cake has cooled down to room temperature, generously spread the frosting and you are done! Enjoy!

Best Chocolate Cake Ever

Rebecca The best gift to give to someone special on their birthday is something personal and authentic (and sweet!). There is no better than baking a cake for that special person.… Main Dish Recipes Best Chocolate Cake Ever European Print This
Nutrition facts: 200 calories 20 grams fat
Rating: 5.0/5
( 1 voted )

Ingredients

  • 1 3/4 cup all-purpose flour
  • 2 cups of sugar
  • 3/4 cup cocoa powder
  • 2 tsp. baking soda
  • 1 tsp. baking powder
  • 1 tsp. salt
  • 2 eggs
  • 1 cup of strong black coffee, cooled
  • 1 cup buttermilk
  • 1/2 cup vegetable oil
  • 1 tsp. of real vanilla extract
  • CHOCOLATE FROSTING
  • 1/2 cup margarine, softened
  • 2 oz melted unsweetened chocolate, cooled
  • 3 cups powdered sugar
  • 3 Tbsp milk
  • 2 tsp. real vanilla extract

Instructions

In a large-sized mixing bowl, combine sugar, flour, cocoa, baking soda, baking powder, and salt. Or if you have a stand mixer, feel free to use it.

Add buttermilk, coffee, eggs, oil, and vanilla in the same mixing bowl and beat for 2 minutes at medium speed until the batter is thin and smooth.

Ready the 9x13-inch pan or two 9-inch cake pans. Make sure to grease them first before pouring the batter.

Baking time is 35 to 40 minutes at 350 degrees C for a 9x13-inch pan. For a 9-inch cake pan, the baking time is 30 to 35 minutes.

Using a stand mixer, combine all frosting ingredients. (You may also use your hand to mix the ingredients.)

When the cake has cooled down to room temperature, generously spread the frosting and you are done! Enjoy!

April 27, 2020 0 comment
0 FacebookTwitterPinterestEmail
Main Dish Recipes

Extra Crispy Chicken Tenders

by Rebecca April 27, 2020
written by Rebecca

Who doesn’t like a crispy and delicious fried chicken breasts? Well, not me! Here’s an amazing recipe you can try! Let’s start frying those chicken breasts you have on your fridge. Enjoy!

 Ingredients

3 lb boneless, skinless chicken breasts cut into even slices – about 5 per breast
onion powder for seasoning chicken

3 eggs

1/4 cup milk

1 Tbsp vegetable oil

1/4 cup all-purpose flour

2 Cups all-purpose flour

1 Tbsp Tony Chachere’s Creole seasoning or Cajun seasoning – use for more chicken seasoning

1/2 – 1 Tbsp garlic powder – more for seasoning chicken

1 Tbsp salt or you can use less if preferred

Oil for frying chicken

For Honey Mustard

3/4 cup of mayonnaise

3 Tbsp honey

3 Tbsp yellow mustard

1 Tbsp lemon juice

few dashes  of hot sauce (optional)

How to cook Extra Crispy Chicken Tenders

Prepare chicken breasts. Cut into even pieces and put in a medium-sized round container.

Add the Garlic powder, Onion powder and, Creole seasoning. Then, toss together to season. Make sure that the chicken breasts are completely covered.

In a medium-sized bowl, add 2 cups of flour, garlic powder, 1 tablespoon of Creole seasoning, and salt. Whisk together.

In a separate medium-sized bowl, add 1/4 cup of flour, 1/4 cup of milk, eggs, and 1 tablespoon of oil. Whisk until creamy and smooth.

In a deep pan or fryer, heat oil to 350 degrees. Remember that we should deep fry the chicken for best result. Then, add 3 to 5 cups of oil or enough to cover the chicken when frying.

Dredge the chicken in the egg mixture and coat with flour.

Using a tong (to avoid oil splatter) put the chicken into the hot oil. Cook for at least 8 to 10 minutes or when golden brown. The chicken floats when it is already cooked.

Do not overcrowd your fryer to avoid greasy chicken. Add only 8 to 10 pieces depending on the size of your pan. Make sure to adjust the heat from time to time to prevent the chicken from burning. Who would want a burnt chicken?

When the chicken breasts are done, put it on a paper towel to drain excess oil. Sprinkle with salt while still hot to add more flavour.

In a medium-sized bowl, add all the ingredients to make the honey mustard sauce. Stir until all ingredients are well-mixed.

Serve and Enjoy!

Extra Crispy Chicken Tenders

Rebecca Who doesn’t like a crispy and delicious fried chicken breasts? Well, not me! Here’s an amazing recipe you can try! Let’s start frying those chicken breasts you have on your… Main Dish Recipes Extra Crispy Chicken Tenders European Print This
Nutrition facts: 200 calories 20 grams fat
Rating: 5.0/5
( 1 voted )

Ingredients

  • 3 lb boneless, skinless chicken breasts cut into even slices - about 5 per breast
  • onion powder for seasoning chicken
  • 3 eggs
  • 1/4 cup milk
  • 1 Tbsp vegetable oil
  • 1/4 cup all-purpose flour
  • 2 Cups all-purpose flour
  • 1 Tbsp Tony Chachere's Creole seasoning or Cajun seasoning - use for more chicken seasoning
  • 1/2 - 1 Tbsp garlic powder - more for seasoning chicken
  • 1 Tbsp salt or you can use less if preferred
  • Oil for frying chicken
  • For Honey Mustard
  • 3/4 cup of mayonnaise
  • 3 Tbsp honey
  • 3 Tbsp yellow mustard
  • 1 Tbsp lemon juice
  • few dashes  of hot sauce (optional)

Instructions

Prepare chicken breasts. Cut into even pieces and put in a medium-sized round container.

Add the Garlic powder, Onion powder and, Creole seasoning. Then, toss together to season. Make sure that the chicken breasts are completely covered.

In a medium-sized bowl, add 2 cups of flour, garlic powder, 1 tablespoon of Creole seasoning, and salt. Whisk together.

In a separate medium-sized bowl, add 1/4 cup of flour, 1/4 cup of milk, eggs, and 1 tablespoon of oil. Whisk until creamy and smooth.

In a deep pan or fryer, heat oil to 350 degrees. Remember that we should deep fry the chicken for best result. Then, add 3 to 5 cups of oil or enough to cover the chicken when frying.

Dredge the chicken in the egg mixture and coat with flour.

Using a tong (to avoid oil splatter) put the chicken into the hot oil. Cook for at least 8 to 10 minutes or when golden brown. The chicken floats when it is already cooked.

Do not overcrowd your fryer to avoid greasy chicken. Add only 8 to 10 pieces depending on the size of your pan. Make sure to adjust the heat from time to time to prevent the chicken from burning. Who would want a burnt chicken?

When the chicken breasts are done, put it on a paper towel to drain excess oil. Sprinkle with salt while still hot to add more flavour.

In a medium-sized bowl, add all the ingredients to make the honey mustard sauce. Stir until all ingredients are well-mixed.

Serve and Enjoy!

April 27, 2020 0 comment
0 FacebookTwitterPinterestEmail
Main Dish Recipes

Mama’s Comforting Chicken & Noodles

by Rebecca April 27, 2020
written by Rebecca

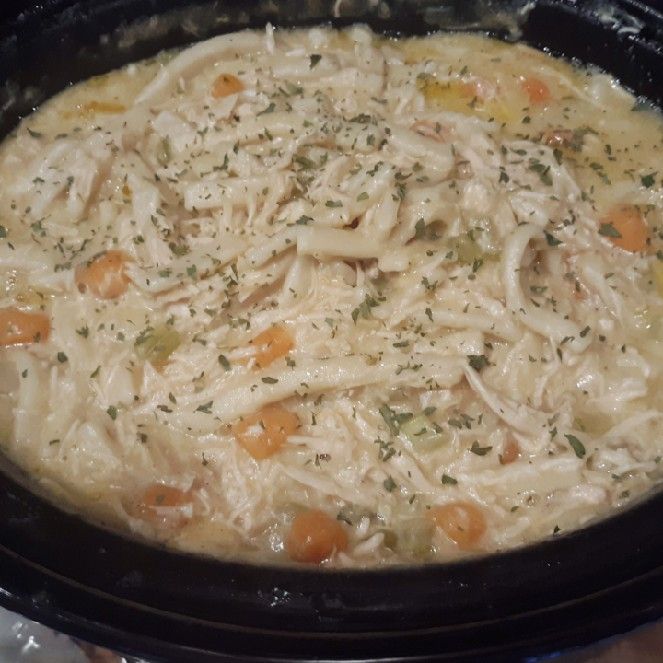
We all have comfort foods that we want to eat whenever we feel down or it’s just raining on a Sunday afternoon while listening to our favourite songs on the radio. Well, for me it’s Chicken Noodles. My mom used to cook this for me when I was little. It’s time for you to experience this amazing and simple recipe! Enjoy!

Ingredients

1 pkg frozen egg noodles, 24 ounce

2 can(s) cream of chicken soup, 14.7 oz each; sometimes I use 1 can chicken and 1 can cream of celery

1 stick (1/2) cup butter – cut into pieces

1 can(s) chicken broth, 32 oz; may want extra to thin out if too thick. The frozen noodles thicken the broth.

mixed vegetables, optional; I didn’t use this time

1 tsp Better Than Bullion, optional; I add for a richer chicken flavour

6 small boneless, skinless chicken breasts or 4 large

salt & pepper, to taste; can add some parsley too if desired

Directions:

Add salt and pepper to chicken breasts to taste.

Place the chicken breasts n the bottom of the Crock-Pot.

Gently cover the chicken with the soup. (Use a spoon)

Cut the butter into several cube-shaped pats and distribute evenly over the soup.

In a small container, pour in the broth and whisk in the bouillon.

Pour in the broth into the soup.

Place the lid on the crock-pot and cook for 6 hours in low heat.

Remove the chicken and shred into small pieces using your hands.

Put back the chicken into the pot.

Add the noodles. (You may also add vegetables if you want to)

Cook for another 2 hours. in this stage, we have different preferences on the desired tenderness of the noodles so, check and stir from time to time until you achieve your desired tenderness.

Add more broth when you’re done cooking as the soup will be thick because of the homemade noodles.

Sprinkle with fresh chopped parsley for colour and extraordinary taste!

You may add salt and pepper depending on your taste. Enjoy!

Mama's Comforting Chicken & Noodles

Rebecca We all have comfort foods that we want to eat whenever we feel down or it’s just raining on a Sunday afternoon while listening to our favourite songs on the… Main Dish Recipes Mama’s Comforting Chicken & Noodles European Print This
Nutrition facts: 200 calories 20 grams fat
Rating: 5.0/5
( 2 voted )

Ingredients

  • 1 pkg frozen egg noodles, 24 ounce
  • 2 can(s) cream of chicken soup, 14.7 oz each; sometimes I use 1 can chicken and 1 can cream of celery
  • 1 stick (1/2) cup butter - cut into pieces
  • 1 can(s) chicken broth, 32 oz; may want extra to thin out if too thick. The frozen noodles thicken the broth.
  • mixed vegetables, optional; I didn't use this time
  • 1 tsp Better Than Bullion, optional; I add for a richer chicken flavour
  • 6 small boneless, skinless chicken breasts or 4 large
  • salt & pepper, to taste; can add some parsley too if desired

Instructions

Add salt and pepper to chicken breasts to taste.

Place the chicken breasts n the bottom of the Crock-Pot.

Gently cover the chicken with the soup. (Use a spoon)

Cut the butter into several cube-shaped pats and distribute evenly over the soup.

In a small container, pour in the broth and whisk in the bouillon.

Pour in the broth into the soup.

Place the lid on the crock-pot and cook for 6 hours in low heat.

Remove the chicken and shred into small pieces using your hands.

Put back the chicken into the pot.

Add the noodles. (You may also add vegetables if you want to)

Cook for another 2 hours. in this stage, we have different preferences on the desired tenderness of the noodles so, check and stir from time to time until you achieve your desired tenderness.

Add more broth when you're done cooking as the soup will be thick because of the homemade noodles.

Sprinkle with fresh chopped parsley for colour and extraordinary taste!

You may add salt and pepper depending on your taste. Enjoy!

April 27, 2020 0 comment
0 FacebookTwitterPinterestEmail
Main Dish Recipes

PINEAPPLE SUNSHINE CAKE

by Rebecca April 27, 2020
written by Rebecca

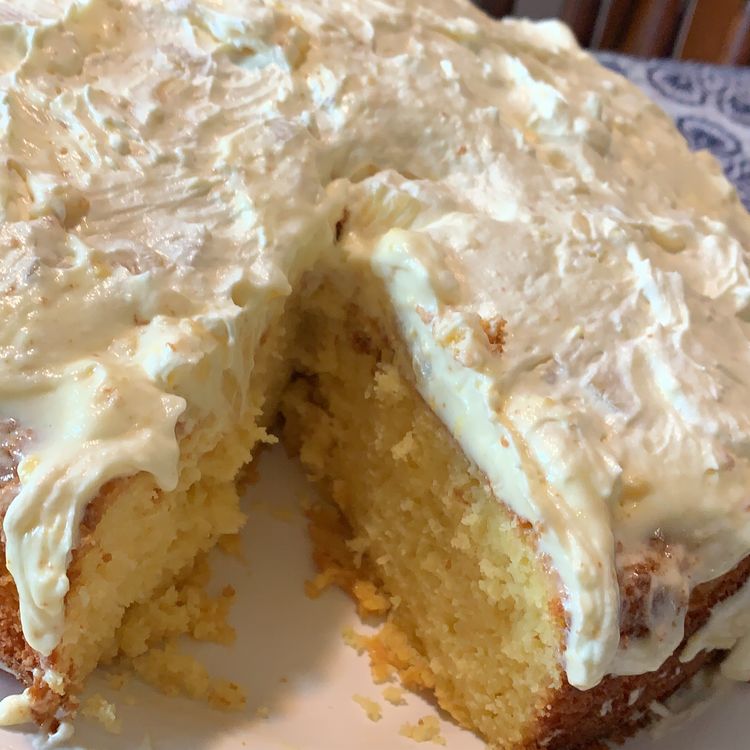
there! How are you? It has been weeks since I made dessert for my kids. I was awakened today by the sound of my kids in the kitchen. They were trying to make my recipe of their favourite Pineapple Sunshine Cake! Well, what can a parent do but to get up and prepare it for them? Try it at home. I know your kids will love it too. It is a very easy and simple recipe that even a self-taught cook like myself can make. The best thing about this recipe is that it would only take up 35 minutes of your time and adding frosting will surely make your kids very excited! It is a bonding moment for me and my kids. I hope you make it yours too! Enjoy baking!

Ingredients

Cake:

1 box of yellow cake mix

4 eggs

1/2 cup oil, (I used vegetable oil)

1 (8 oz) can crush pineapple with juice

Frosting:

1 (8 oz) container whipped topping, thawed

1 small box instant vanilla pudding

1 (8 oz) can crush pineapple with juice

How to make Pineapple Sunshine Cake

Prepare the oven. Preheat to 350 degrees C. Use a 9 x 13-inches  pan and spray with cooking spray.

Combine cake mix, oil, eggs, and 1 can of crushed pineapple including the juice. Mix well until all ingredients incorporate.

Pour the mix into the prepared baking pan and let it sit in the oven for 25 to 30 minutes. Use a toothpick to pinch the cake in the centre and see if it comes out clean. This is an indication that your cake is ready for cooling.

Place the cake on the wire rack and allow it to cool.

We’re almost done! Now, in a medium-sized bowl, fold together the box vanilla pudding, whipped topping, and 1 crushed pineapple including the juice. Then, spread the mix over the top of the cake. Serve and enjoy!

PINEAPPLE SUNSHINE CAKE

Rebecca there! How are you? It has been weeks since I made dessert for my kids. I was awakened today by the sound of my kids in the kitchen. They were… Main Dish Recipes PINEAPPLE SUNSHINE CAKE European Print This
Nutrition facts: 200 calories 20 grams fat
Rating: 5.0/5
( 1 voted )

Ingredients

  • Cake:
  • 1 box of yellow cake mix
  • 4 eggs
  • 1/2 cup oil, (I used vegetable oil)
  • 1 (8 oz) can crush pineapple with juice
  • Frosting:
  • 1 (8 oz) container whipped topping, thawed
  • 1 small box instant vanilla pudding
  • 1 (8 oz) can crush pineapple with juice

Instructions

Prepare the oven. Preheat to 350 degrees C. Use a 9 x 13-inches  pan and spray with cooking spray.

Combine cake mix, oil, eggs, and 1 can of crushed pineapple including the juice. Mix well until all ingredients incorporate.

Pour the mix into the prepared baking pan and let it sit in the oven for 25 to 30 minutes. Use a toothpick to pinch the cake in the centre and see if it comes out clean. This is an indication that your cake is ready for cooling.

Place the cake on the wire rack and allow it to cool.

We're almost done! Now, in a medium-sized bowl, fold together the box vanilla pudding, whipped topping, and 1 crushed pineapple including the juice. Then, spread the mix over the top of the cake. Serve and enjoy!

April 27, 2020 0 comment
0 FacebookTwitterPinterestEmail
Main Dish Recipes

COCONUT CREAM PIE CHEESECAKE

by Rebecca April 27, 2020
written by Rebecca

A slice of this heavenly delicious coconut cream pie cheesecake will leave you wanting for more!

Ingredients

Crust:

4 cups coconut cookies, crushed finely

10 Tbsp butter, melted

3 Tbsp sugar

For the Cheesecake filling:

5 large eggs, room temperature

1 15 oz can coconut cream

4 8-ounces packages Philadelphia cream cheese, room temperature

8 Tbsp unsalted butter, room temperature

1 1/2 cups sugar

2 Tbsp cornstarch

2 Tbsp vanilla extract

1 tsp fresh lemon juice

1 tsp grated lemon zest

1 cup toasted coconut to top

whipped cream to top

How to make Coconut Cream Pie Cheesecake

1. Prepare the oven. Preheat to 350 degrees.

2. Spray a springform pan with a nonstick cooking spray.

3. Using a blender, blend cookies, and pulse well. Add butter and sugar and mix well.

4. Pour crust mixture in a pan. Using the back of a measuring cup, tap mixture on the bottom and up the sides of the springform pan. The mixture is enough to go halfway up the sides of the pan.

5. Bake for 13 minutes. Once done, set aside to cool.

6. Now, reduce oven temperature to 300 degrees.

7. It is important to tightly wrap the pan with a double layer of heavy-duty aluminium foil because this will help to prevent water from seeping into the pan.

To Prepare Cheesecake Batter

1. Blend well the eggs and coconut cream for about 1 minute.

2. In a medium-sized bowl, beat the cream cheese with the butter until smooth and creamy. Then, add this to the egg-cream mixture and make sure to thoroughly beat until smooth.

3. Once the mixture is set, add the sugar, cornstarch, vanilla, lemon juice, and lemon zest, and beat for another 2 minutes.

4. Pour mixture into the greased springform pan and place it in a roasting pan. Make sure that it is large enough to prevent the sides from touching.

5. Place in the oven and slowly and carefully pour in enough hot tap water to reach halfway up the sides of the springform pan.

5. Bake for 2 hours and 15 minutes or until the cake is light in colour. You may want to insert a knife or toothpick in the centre of the cake to check doneness. Once inserted knife or toothpick comes out clean, you know the cake is ready.

6. Now, remove from the water bath and carefully peel the aluminium foil from around the pan.

7. Cool the cheesecake at room temperature for about 4 hours.

8. Once cheesecake is cooled, place in the refrigerator uncovered and chill overnight.

When you are ready to serve. Top cheesecake with toasted coconut and whipped cream.

COCONUT CREAM PIE CHEESECAKE

Rebecca A slice of this heavenly delicious coconut cream pie cheesecake will leave you wanting for more! Ingredients Crust: 4 cups coconut cookies, crushed finely 10 Tbsp butter, melted 3 Tbsp… Main Dish Recipes COCONUT CREAM PIE CHEESECAKE European Print This
Nutrition facts: 200 calories 20 grams fat
Rating: 5.0/5
( 1 voted )

Ingredients

  • Crust:
  • 4 cups coconut cookies, crushed finely
  • 10 Tbsp butter, melted
  • 3 Tbsp sugar
  • For the Cheesecake filling:
  • 5 large eggs, room temperature
  • 1 15 oz can coconut cream
  • 4 8-ounces packages Philadelphia cream cheese, room temperature
  • 8 Tbsp unsalted butter, room temperature
  • 1 1/2 cups sugar
  • 2 Tbsp cornstarch
  • 2 Tbsp vanilla extract
  • 1 tsp fresh lemon juice
  • 1 tsp grated lemon zest
  • 1 cup toasted coconut to top
  • whipped cream to top

Instructions

1. Prepare the oven. Preheat to 350 degrees.

2. Spray a springform pan with a nonstick cooking spray.

3. Using a blender, blend cookies, and pulse well. Add butter and sugar and mix well.

4. Pour crust mixture in a pan. Using the back of a measuring cup, tap mixture on the bottom and up the sides of the springform pan. The mixture is enough to go halfway up the sides of the pan.

5. Bake for 13 minutes. Once done, set aside to cool.

6. Now, reduce oven temperature to 300 degrees.

7. It is important to tightly wrap the pan with a double layer of heavy-duty aluminium foil because this will help to prevent water from seeping into the pan.

To Prepare Cheesecake Batter

1. Blend well the eggs and coconut cream for about 1 minute.

2. In a medium-sized bowl, beat the cream cheese with the butter until smooth and creamy. Then, add this to the egg-cream mixture and make sure to thoroughly beat until smooth.

3. Once the mixture is set, add the sugar, cornstarch, vanilla, lemon juice, and lemon zest, and beat for another 2 minutes.

4. Pour mixture into the greased springform pan and place it in a roasting pan. Make sure that it is large enough to prevent the sides from touching.

5. Place in the oven and slowly and carefully pour in enough hot tap water to reach halfway up the sides of the springform pan.

5. Bake for 2 hours and 15 minutes or until the cake is light in colour. You may want to insert a knife or toothpick in the centre of the cake to check doneness. Once inserted knife or toothpick comes out clean, you know the cake is ready.

6. Now, remove from the water bath and carefully peel the aluminium foil from around the pan.

7. Cool the cheesecake at room temperature for about 4 hours.

8. Once cheesecake is cooled, place in the refrigerator uncovered and chill overnight.

When you are ready to serve. Top cheesecake with toasted coconut and whipped cream.

April 27, 2020 0 comment
0 FacebookTwitterPinterestEmail
Newer Posts
Older Posts

Popular Posts

  • 1

    Crispy Crunchy Parmesan Potatoes

    March 21, 2020
  • 2

    CROCK POT SMOTHERED PORK CHOPS

    March 21, 2020
  • Facebook
  • Twitter

@2019 - All Right Reserved.


Back To Top